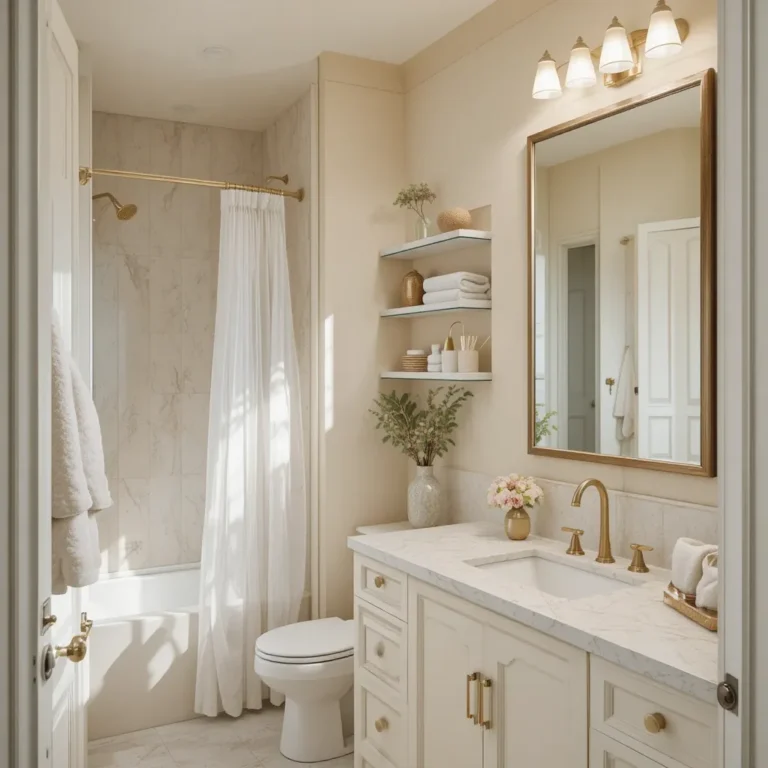
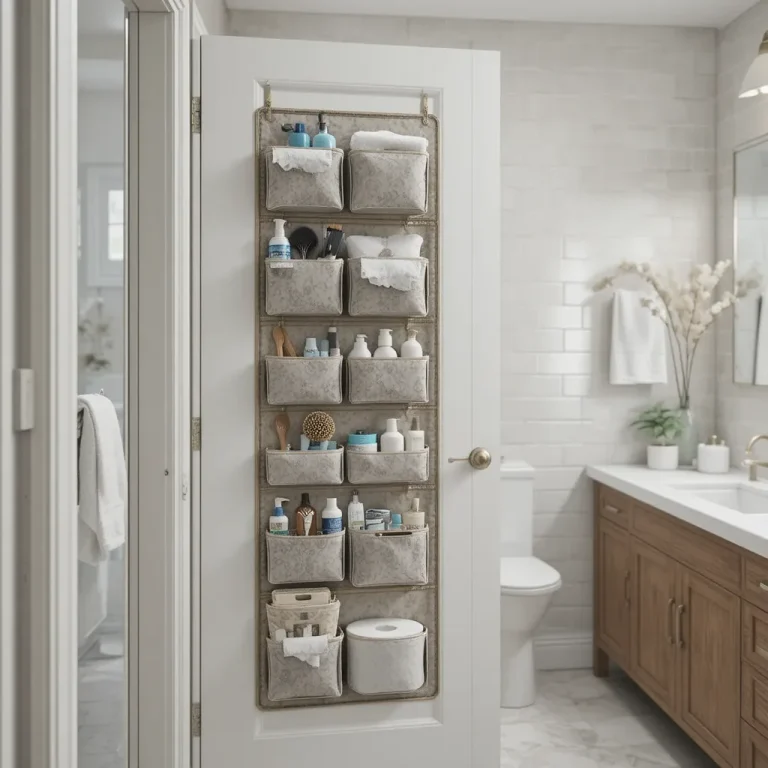
How to Clean a Bathroom: A Step-by-Step Guide to a Sparkling Space

How to clean a bathroom properly is one of those household skills that sounds simple until you are standing in front of soap scum, water stains, dusty corners, and a shower that has clearly seen better days. The good news? You do not need to spend your entire weekend scrubbing to getbeautifully clean bathroom.
With the right order of tasks and a few smart cleaning habits, you can clean your bathroom more efficiently and get better results. This guide walks you through everything from gathering your supplies and removing clutter to tackling the toilet, sink, shower, tub, mirrors, grout, and floor.
Whether you are doing a quick weekly refresh or a serious deep clean, these practical steps will help you create a bathroom that looks fresh, smells clean, and feels genuinely satisfying to use.
Why the Right Cleaning Order Matters
Before diving into the actual steps, let us talk about something that can make bathroom cleaning dramatically easier: the order in which you clean.
Cleaning randomly often means doing the same work twice. You wipe down the counter, then dust falls onto it. You mop the floor, then clean the toilet and splash dirty water everywhere. You polish the mirror, then spray cleaner near it while scrubbing the sink.
It is a frustrating little cleaning circle.
The most efficient approach is to work from top to bottom and from dry to wet whenever possible. Start with high surfaces, mirrors, and dust. Then move to countertops, sinks, showers, tubs, toilets, and finally the floor.
It also helps to give cleaning products enough time to work. A good bathroom cleaner can loosen soap scum and grime while you tackle another area. You do not have to attack every stain with the determination of someone personally offended by it.
A smart cleaning order looks like this:
- Open windows or turn on ventilation.
- Remove clutter and empty the trash.
- Gather cleaning supplies.
- Dust and remove loose debris.
- Apply cleaners and let them sit.
- Clean mirrors and glass.
- Clean the sink and countertop.
- Scrub the shower or bathtub.
- Clean the toilet.
- Mop the floor.
- Replace clean towels and organize essentials.
- Do a final inspection.
This simple system makes the entire process faster and prevents you from undoing your hard work.
How to Clean a Bathroom: Gather Your Supplies First
One of the easiest ways to make cleaning feel exhausting is to start without the supplies you need. You scrub for two minutes, realize you are missing a cloth, walk to another room, find something else to distract you, and suddenly you are reorganizing a drawer you forgot existed.
Save yourself the detour.
For a thorough bathroom cleaning session, gather:
- Microfiber cleaning cloths
- A non-scratch sponge
- Scrub brush
- Old toothbrush or small detailing brush
- Toilet brush
- Bucket
- Mop
- Vacuum or broom
- Rubber cleaning gloves
- Bathroom cleaner
- Glass cleaner
- Toilet bowl cleaner
- Grout cleaner, if needed
- Mild dish soap
- Baking soda for appropriate cleaning tasks
- Clean towels or rags
- Trash bag
Always read the label on your cleaning products and follow the manufacturer’s instructions. Different surfaces require different care, and some cleaners are not suitable for natural stone, delicate finishes, or certain fixtures.
Most importantly, never mix cleaning chemicals. Products containing bleach should never be mixed with ammonia, acids, vinegar, or other incompatible cleaners. Dangerous fumes can result.
Good ventilation matters, too. Turn on the exhaust fan, open a window when possible, and take breaks if the fumes become overwhelming.
Step 1: Remove Everything From the Bathroom

Start by taking out anything that does not belong in the bathroom.
Remove:
- Dirty laundry
- Towels
- Bath mats
- Empty bottles
- Trash
- Toys
- Decorative items
- Countertop clutter
- Products that belong in another room
This gives you clear access to the surfaces that need cleaning.
While you are at it, check your bathroom products. Throw away empty containers and dispose of expired products according to local guidelines. If you have five nearly identical bottles of body wash taking up half the shower, consider consolidating your collection.
A clutter-free bathroom is much easier to clean and maintain.
Take bath mats and washable rugs outside or place them directly in the laundry. Shake out or vacuum them according to their care instructions.
If you have a shower curtain that is machine washable, check the label and wash it as recommended. A clean bathroom can still feel less than fresh when the shower curtain is stained or musty.
Step 2: Dust and Remove Loose Dirt

Before introducing water, remove as much dry dust and loose debris as possible.
Use a microfiber cloth or duster to clean:
- Light fixtures
- Vent covers
- Exhaust fan surfaces
- Shelves
- Cabinet tops
- Window sills
- Door frames
- Baseboards
- Decorative objects
Work from high to low.
If you have a ceiling exhaust fan, gently remove surface dust according to the manufacturer’s instructions. A dusty fan cannot ventilate the bathroom as effectively, and good ventilation is essential for controlling moisture.
Use a vacuum or broom to remove hair and dust from the floor, especially around the toilet and behind bathroom furniture.
This step may seem insignificant, but it makes the wet cleaning stage much easier. You are removing dry debris before it turns into damp, sticky grime.
Step 3: Apply Bathroom Cleaners and Let Them Work

Now it is time to use your cleaning products strategically.
Apply the appropriate cleaner to the shower walls, bathtub, sink, countertop, and other suitable surfaces. Follow the product label for recommended contact time.
The key here is do not immediately wipe everything away.
Many bathroom cleaners need time to loosen soap residue, body oils, mineral deposits, and grime. Allowing the product to sit as directed can reduce the amount of scrubbing you need to do.
This is your opportunity to multitask.
Apply cleaner to the shower, then move to the mirror. While the cleaner works on the tub, clean the countertop. Just make sure you follow product instructions and avoid allowing cleaners to dry on surfaces if the label advises otherwise.
For delicate materials such as marble, limestone, or other natural stone, use only products specifically recommended for those surfaces. Acidic cleaners can damage some stone finishes.
Step 4: Clean the Bathroom Mirror and Glass

Few things make a bathroom look instantly cleaner than a spotless mirror.
Start by removing loose dust with a dry microfiber cloth. Then use a suitable glass cleaner according to its instructions.
Spray the product onto your cloth rather than soaking the mirror, especially around the edges. Excess liquid can seep behind the glass or damage surrounding materials.
Wipe using overlapping strokes, then buff with a clean, dry microfiber cloth.
If you still see streaks, the problem may be too much product rather than too little effort. A small amount of cleaner is often enough.
For shower glass, soap scum and hard-water deposits may require a specialized cleaner. Use a product suitable for your specific glass and follow the directions carefully.
Once clean, dry the glass thoroughly.
For ongoing maintenance, use a squeegee after showers to remove excess water from glass walls and doors. It takes less than a minute and can significantly reduce water spots and soap buildup.
Step 5: Clean the Bathroom Countertop

Next, tackle the countertop.
Remove everything from the surface and wipe away loose dust or debris. Then clean using a product appropriate for the countertop material.
Pay attention to:
- Around the faucet
- Behind soap dispensers
- Around toothbrush holders
- Along backsplash edges
- Seams and corners
These areas often collect toothpaste residue, hair, water droplets, and general grime.
If you have a crowded countertop, this is also a perfect time to simplify your setup. Keep frequently used products accessible and store everything else in drawers or cabinets.
A clean countertop instantly makes the entire bathroom feel more organized.
Be cautious with natural stone surfaces. Avoid using cleaners that can etch or damage the material. Always check the manufacturer’s care recommendations for countertops made from marble, granite, quartz, or other specialty materials.
Step 6: Give the Sink a Thorough Cleaning

The bathroom sink is a surprisingly hardworking surface. It deals with toothpaste, soap, shaving residue, hair, makeup, and water spots every day.
Start by rinsing away loose debris.
Apply an appropriate cleaner to the basin and surrounding area. Use a non-scratch sponge or microfiber cloth to clean the surface.
Pay special attention to:
- The faucet base
- Faucet handles
- Drain opening
- Overflow opening
- Edges around the basin
Use a small brush or old toothbrush to reach tight areas around the faucet and drain.
Rinse thoroughly and dry with a clean microfiber cloth.
Drying is worth the extra few seconds. It removes remaining water spots and leaves the sink looking polished rather than simply clean.
If the drain has an unpleasant odor or drains slowly, address the issue according to the drain manufacturer’s recommendations. Avoid mixing chemical drain products with other cleaners.
Step 7: How to Clean a Shower and Bathtub

The shower and bathtub are usually where bathroom cleaning becomes a real workout.
Soap scum, shampoo residue, body oils, and mineral deposits can build up quickly, particularly in areas with hard water.
Start at the top and work downward.
Clean:
- Shower walls
- Shower fixtures
- Showerhead
- Tub or shower floor
- Corners and seams
- Shower door or curtain area
Use a cleaner designed for the surface you are cleaning. Allow it to sit for the recommended time, then scrub using a suitable sponge or brush.
Do not use abrasive tools on surfaces that can scratch easily.
Pay particular attention to corners and areas where the wall meets the tub or shower floor. These spots can collect moisture and grime.
Rinse thoroughly to remove cleaner and loosened residue.
Then dry the surfaces where appropriate.
If your shower has glass doors, finish by cleaning and drying the glass separately.
How to Deal With Soap Scum
Soap scum often appears as a cloudy, dull film on shower walls and glass. Regular cleaning helps prevent it from becoming stubborn.
Use a suitable bathroom or shower cleaner and follow its instructions. For heavy buildup, you may need to repeat the process rather than scrubbing aggressively.
A soft brush can help loosen stubborn residue without damaging the surface.
The best strategy, however, is prevention. After showering, rinse away excess product and use a squeegee on glass surfaces.
How to Clean Shower Grout
Grout can make an otherwise clean bathroom look dirty when it becomes discolored.
For routine cleaning, use a grout-safe cleaner and an appropriate brush. Work in small sections, gently scrubbing the grout lines.
Avoid aggressive scrubbing that could damage grout or surrounding surfaces.
For stubborn staining, choose a product specifically designed for your type of grout and follow the manufacturer’s instructions. If grout is cracked, crumbling, or persistently discolored despite cleaning, it may require repair or replacement rather than more scrubbing.
After cleaning, rinse away residue and dry the area thoroughly.
Step 8: Clean the Toilet From Top to Bottom

Now for the bathroom task nobody puts on their dream home mood board: the toilet.
The good news is that cleaning it properly is straightforward.
Start with the exterior.
Clean:
- Toilet tank
- Flush handle
- Lid
- Seat
- Hinges
- Outside of the bowl
- Base
- Floor around the toilet
Use a suitable disinfecting or bathroom cleaner according to the product label.
Do not forget the flush handle. It is touched frequently and can easily become overlooked during routine cleaning.
Next, apply toilet bowl cleaner according to the label instructions. Allow it to sit for the recommended time before scrubbing with a toilet brush.
Pay attention to the area beneath the rim, where buildup can hide.
Flush as directed, then rinse or clean the toilet brush according to its care instructions.
Finally, wipe the toilet exterior with a clean cloth.
A useful tip: Keep toilet-cleaning tools separate from the cloths you use on sinks and countertops. Cross-contamination is the last thing you want in a bathroom cleaning routine.
Step 9: Clean the Bathroom Floor

The floor should be one of the final areas you clean.
By this point, dust, hair, and debris have fallen from other surfaces, and you have already finished most of the wet cleaning.
Start by vacuuming or sweeping thoroughly.
Pay attention to:
- Corners
- Behind the toilet
- Around the vanity
- Along baseboards
- Under bathroom furniture
- Behind doors
Then mop using a solution suitable for your flooring material.
Avoid excessive water, particularly on wood, laminate, or other moisture-sensitive floors.
Work your way toward the bathroom exit so you do not have to walk across freshly cleaned flooring.
Allow the floor to dry thoroughly before replacing bath mats or rugs.
Step 10: Wash and Replace Towels and Bath Mats

Fresh textiles can completely transform the feeling of a clean bathroom.
Replace used towels with freshly washed ones. Wash bath mats according to their care labels and make sure they dry completely.
Hang towels so they can dry properly between uses. Avoid leaving damp towels crumpled on the floor or piled on a counter.
If your bathroom tends to stay humid, good airflow becomes even more important. Turn on the exhaust fan during showers and continue running it for the recommended period afterward.
Moisture that lingers in the room can contribute to musty odors and encourage mold and mildew growth.
A sparkling bathroom is not just about removing dirt. It is also about managing moisture.
Step 11: Clean and Organize Bathroom Storage

Now that the main cleaning is complete, take a few minutes to check your storage areas.
Wipe down:
- Vanity drawers
- Cabinet shelves
- Open shelving
- Medicine cabinet surfaces
- Shower storage
- Baskets and organizers
You do not necessarily need to empty every cabinet during a weekly clean. Instead, focus on visible dirt, spills, and areas that need attention.
During a deeper seasonal clean, remove everything and wipe the inside of cabinets and drawers thoroughly.
Group similar items together so they are easier to find. Keep everyday essentials within reach and store less frequently used products elsewhere.
This small organizational step makes future cleaning much easier.
How to Clean a Bathroom Quickly When You Are Short on Time
Sometimes you do not have an hour to dedicate to bathroom cleaning. Maybe guests are arriving in 20 minutes, or perhaps you simply looked around and thought, “Absolutely not today.”
It happens.
For a quick bathroom refresh, prioritize the areas that make the biggest visual difference.
The 15-Minute Bathroom Reset
Minutes 1–3: Remove clutter and empty the trash.
Minutes 4–6: Clean the mirror and wipe the countertop.
Minutes 7–9: Clean the sink and faucet.
Minutes 10–12: Clean the toilet seat, handle, lid, and exterior.
Minutes 13–15: Sweep or vacuum the floor and replace towels.
This will not replace a deep clean, but it can make the room feel dramatically fresher.
The trick is to focus on high-impact surfaces instead of trying to do everything halfway.
How Often Should You Clean Your Bathroom?
There is no universal schedule that works for every household. A bathroom used by one person will naturally need less attention than a busy family bathroom.
A practical routine looks something like this:
Daily or Every Few Days
- Wipe visible water from the sink
- Hang towels properly
- Remove obvious clutter
- Rinse the shower area
- Use a squeegee on glass if needed
Weekly
- Clean the toilet
- Scrub the sink
- Clean countertops
- Clean the shower or tub
- Clean mirrors
- Sweep and mop floors
- Replace and wash towels as needed
Monthly
- Dust vents and light fixtures
- Clean cabinet fronts
- Deep clean grout
- Clean shower doors thoroughly
- Wash bath mats
- Check corners for mildew or buildup
Seasonally
- Deep clean inside cabinets and drawers
- Declutter expired or unused products
- Clean behind and underneath movable furniture
- Inspect caulking and grout
- Check ventilation
- Wash or replace shower curtains according to their care instructions
The more consistently you handle small messes, the less intimidating deep cleaning becomes.
Common Bathroom Cleaning Mistakes to Avoid
Even with the best intentions, a few common mistakes can make bathroom cleaning harder.
Cleaning From the Bottom Up
Always work from higher surfaces toward lower ones. Otherwise, dust and dirty water can land on areas you have already cleaned.
Using Too Much Cleaning Product
More cleaner does not automatically mean a cleaner surface. Excess product can leave behind residue and make surfaces look dull.
Follow the product instructions.
Ignoring the Small Details
Door handles, light switches, faucet handles, flush levers, and cabinet pulls are easy to forget because they are not always visibly dirty.
However, they are frequently touched and deserve regular attention.
Using the Same Cloth Everywhere
Use separate cloths for different bathroom areas and wash reusable cleaning cloths properly after use.
Never use a cloth that has cleaned the toilet on your sink or countertop.
Forgetting to Ventilate
Moisture is one of the biggest challenges in bathroom maintenance. Use your exhaust fan and improve airflow whenever possible.
Cleaning Without Checking Surface Compatibility
A cleaner that works beautifully on ceramic tile may not be appropriate for natural stone. Always check product labels and surface-care recommendations.
How to Keep Your Bathroom Cleaner for Longer
The secret to a consistently clean bathroom is not cleaning harder. It is cleaning smarter.
Here are a few habits that can make a noticeable difference:
Keep a Squeegee in the Shower
Use it after showering to remove excess water from glass and smooth surfaces.
Wipe the Sink Regularly
A quick wipe removes toothpaste and water spots before they become stubborn buildup.
Improve Ventilation
Run the exhaust fan during showers and afterward as recommended. Good airflow helps manage moisture.
Deal With Spills Immediately
Hair products, cosmetics, toothpaste, and soap are much easier to clean when they are fresh.
Reduce Countertop Clutter
Fewer items mean fewer surfaces to clean around.
Wash Towels Regularly
Fresh towels contribute significantly to that clean, comfortable bathroom feeling.
Do Small Tasks Often
Five minutes of maintenance here and there can save you from a much bigger cleaning marathon later.
A Simple Bathroom Cleaning Checklist
Save this checklist for your next cleaning session:
Declutter
- Remove trash
- Remove dirty towels
- Take out laundry
- Put products away
- Remove unnecessary items
Dust
- Light fixtures
- Vent covers
- Shelves
- Cabinets
- Baseboards
Clean
- Mirror
- Countertop
- Sink
- Faucet
- Shower
- Bathtub
- Grout
- Toilet
- Floor
Finish
- Replace clean towels
- Replace bath mats
- Empty trash
- Organize products
- Ventilate the room
- Check for missed spots
Having a checklist may sound overly organized, but it prevents that classic moment when you finish cleaning and suddenly notice the dusty baseboard you forgot about.
Frequently Asked Questions About How to Clean a Bathroom
What is the best order for cleaning a bathroom?
The best approach is generally to declutter first, dust high surfaces, apply appropriate cleaners, clean mirrors and glass, wash countertops and sinks, scrub the shower and bathtub, clean the toilet, and finish with the floor. This top-to-bottom approach helps prevent you from cleaning the same area twice.
How often should you deep clean a bathroom?
For most homes, a thorough deep clean every few weeks or monthly can work well, depending on how frequently the bathroom is used. Regular weekly cleaning and quick maintenance between deeper sessions will help keep buildup under control.
How do you clean a bathroom quickly?
Focus on high-impact areas first. Remove clutter, clean the mirror, wipe the countertop and sink, clean the toilet, and sweep or mop the floor. If you have extra time, tackle the shower and bathtub.
How do you keep a bathroom smelling fresh?
Good ventilation is essential. Remove trash regularly, allow towels to dry completely, clean drains according to their care requirements, and address moisture problems promptly. Avoid simply masking persistent odors with fragrance, as an unpleasant smell can sometimes indicate an underlying issue.
How do you clean bathroom grout?
Use a grout-safe cleaner and an appropriate brush. Work in small sections, gently scrub the grout, and rinse away residue. For persistent discoloration or damaged grout, cleaning alone may not solve the problem, and repairs may be necessary.
Should you clean the toilet or shower first?
There is no single rule, but many people prefer to clean the shower and sink before tackling the toilet, then finish with the floor. The most important thing is to work systematically and keep toilet-cleaning tools separate from tools used on other bathroom surfaces.
Final Thoughts
Learning how to clean a bathroom does not have to mean spending hours scrubbing until your arms give up on you. The biggest difference comes from having a system: declutter first, work from top to bottom, let cleaning products do some of the heavy lifting, and save the floor for last. Regular maintenance also prevents soap scum, grime, water spots, and clutter from becoming overwhelming.
Once you find a routine that works for your home, bathroom cleaning becomes much more manageable and the reward is a fresh, sparkling room that feels good every time you walk through the door. Because honestly, few household victories are quite as satisfying as stepping into a spotless bathroom and knowing you did that.

How to Clean a Bathroom: A Step-by-Step Guide to a Sparkling Space
Learn how to clean a bathroom from top to bottom with this easy step-by-step bathroom cleaning guide. Get practical tips for cleaning sinks, toilets, showers, tubs, mirrors, floors, grout, fixtures, and hard-to-reach areas. Follow this simple bathroom cleaning routine to remove dirt, soap scum, stains, and everyday buildup for a fresh, sparkling result. #BathroomCleaning #CleaningTips #BathroomCleaningTips #HomeCleaning #CleaningHacks
Pin it on Pinterest