DIY Wall Art Ideas Anyone Can Make (No Skills Needed!)
Hey there, fellow home décor lover! If you’ve ever stared at a blank wall in your living room or bedroom and thought, “Wow, this could use a little personality… but I have zero artistic skills,” then you’ve come to the right place. Today, we’re diving into the ultimate guide of DIY wall art ideas anyone can make—yes, even if you can’t draw a stick figure without it looking like a stick accident.
By the end of this post, you’ll have a treasure trove of ideas, step-by-step inspiration, and styling tips that will transform your blank walls into stunning focal points. Plus, you’ll discover how easy and fun it can be to add your own personal touch without spending a fortune.
So, grab a cup of coffee (or your favorite wine—no judgment), and let’s make your walls happy!
Why DIY Wall Art Is a Game-Changer for Your Home
Before we jump into the fun, let’s chat about why DIY wall art is such a win:
Cost-effective: Buying art can get expensive fast. DIY lets you create something chic without breaking the bank.
Unique and personal: You won’t find your creation in anyone else’s home—ever.
Satisfying: Seriously, nothing beats that “I made this” feeling.
Flexible: You can change your art as often as your mood changes.
Whether you’re decorating your living room, bedroom, or even a tiny apartment, DIY wall art lets your personality shine through. And the best part? You don’t need prior experience, fancy tools, or expensive materials.
1. Abstract String Art: Modern and Minimalist
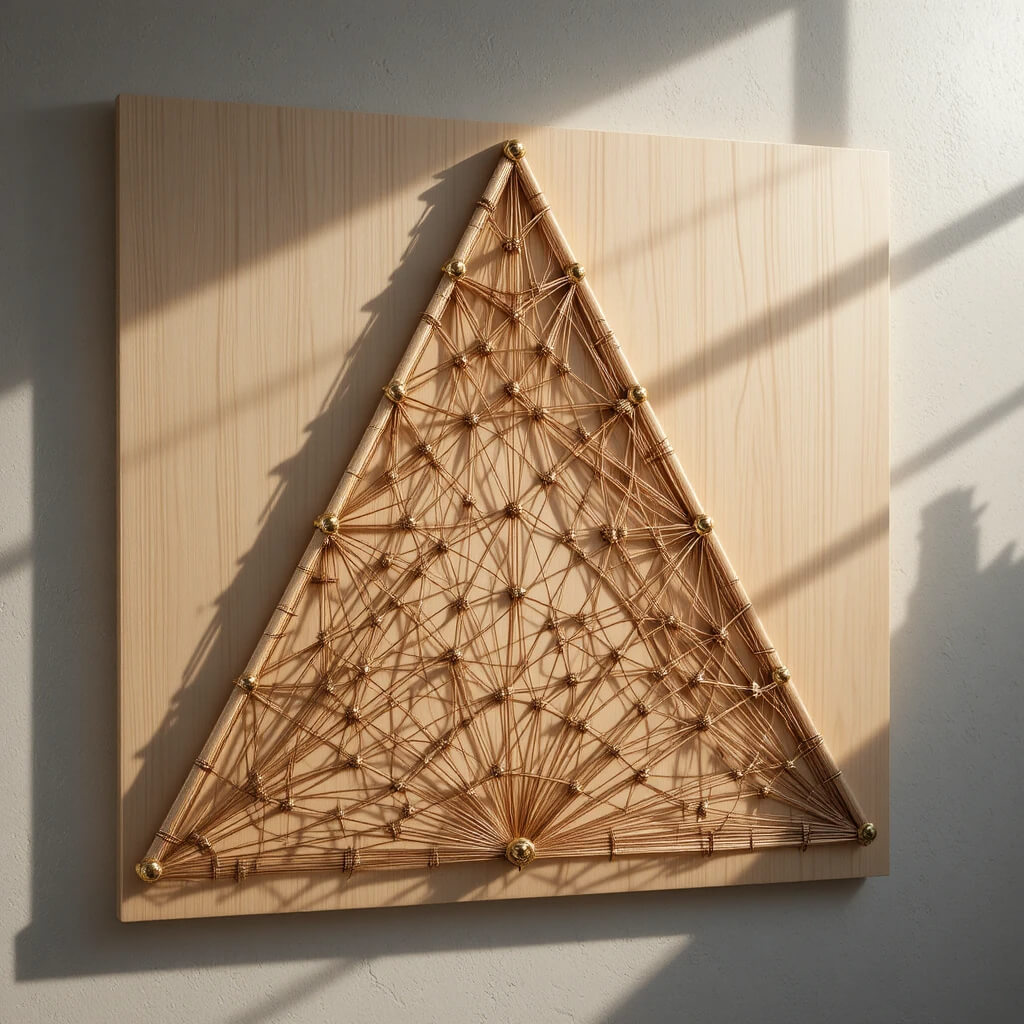
If you’ve ever seen those cool geometric designs made with nails and string, you’ll love this idea. It’s modern, Pinterest-worthy, and surprisingly simple.
What You’ll Need:
- A wooden board or canvas
- Small nails
- Colored string or embroidery thread
- Hammer
How to Make It:
- Sketch a simple shape on the board (triangle, heart, or even a wave).
- Hammer nails along the lines of your shape.
- Loop the string around the nails in creative patterns.
Styling Tip: Use metallic threads for a chic, modern vibe or pastel threads for a soft, dreamy look. Hang it above your bed or desk for maximum impact.
2. Washi Tape Wall Designs: Easy and Colorful
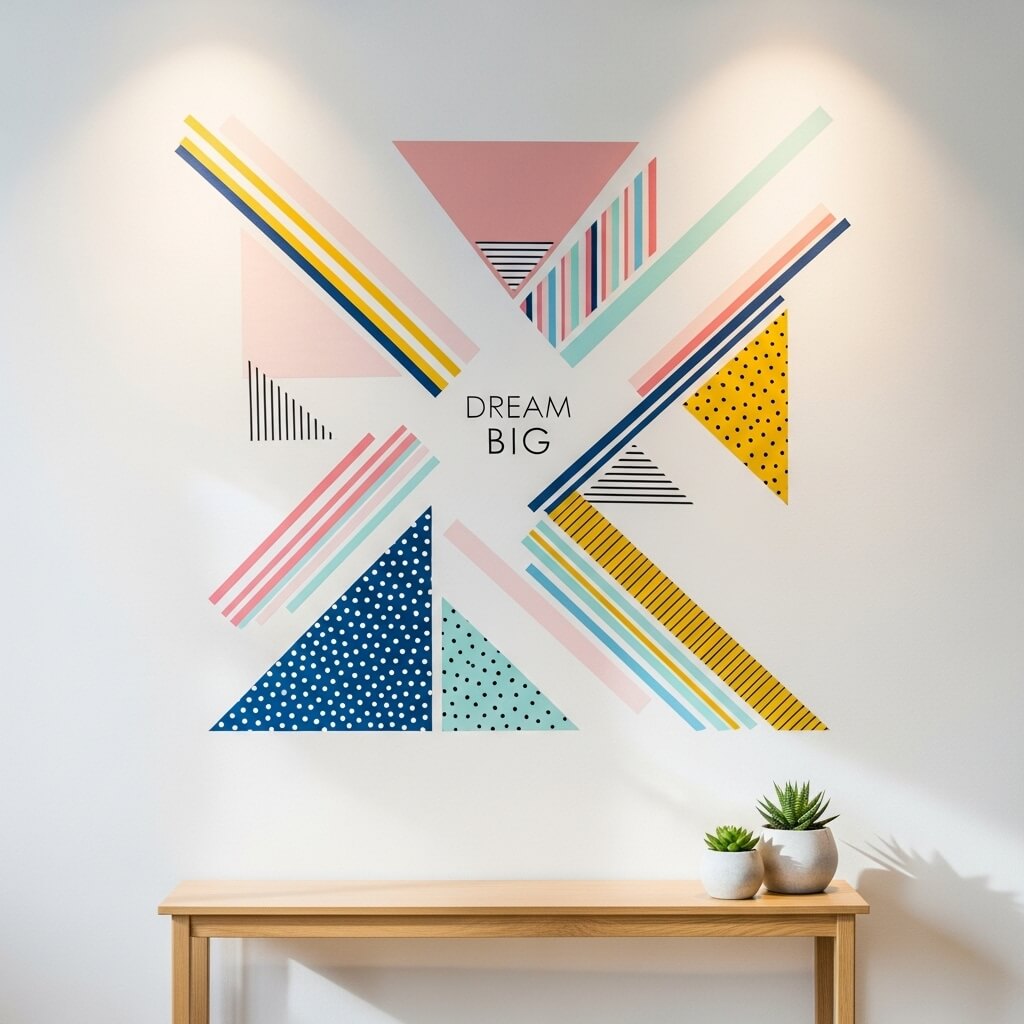
Washi tape is the holy grail of beginner-friendly wall art. The tape comes in endless patterns and colors, and best of all—it won’t damage your walls.
Ideas to Try:
- Geometric Patterns: Create triangles, squares, or stripes.
- Quotes & Sayings: Spell out motivational words.
- Framing Photos: Use tape as a funky photo frame.
Pro Tip: Layer different tape colors for a 3D effect. Your wall instantly feels artsy without a single drop of paint.
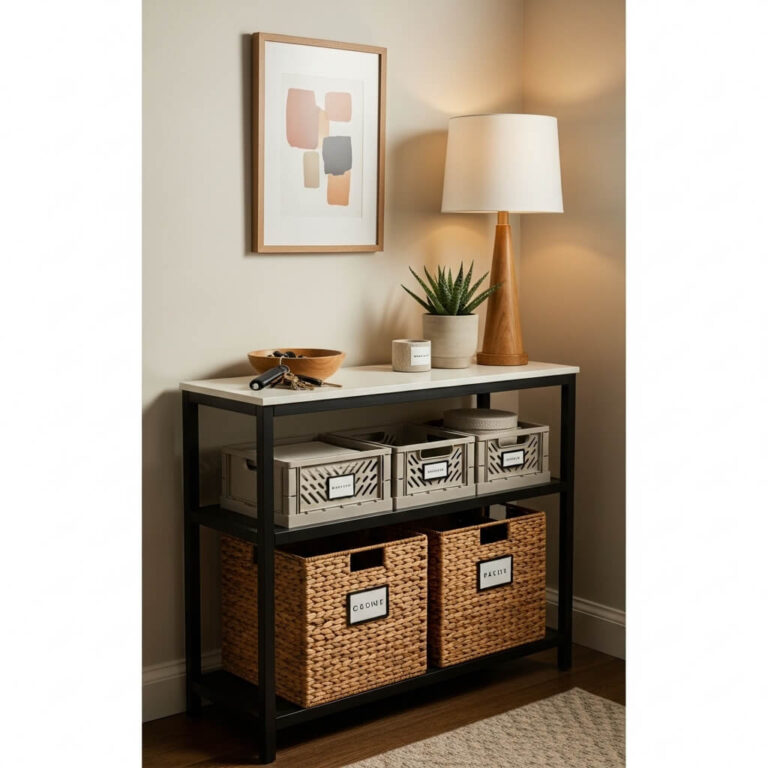
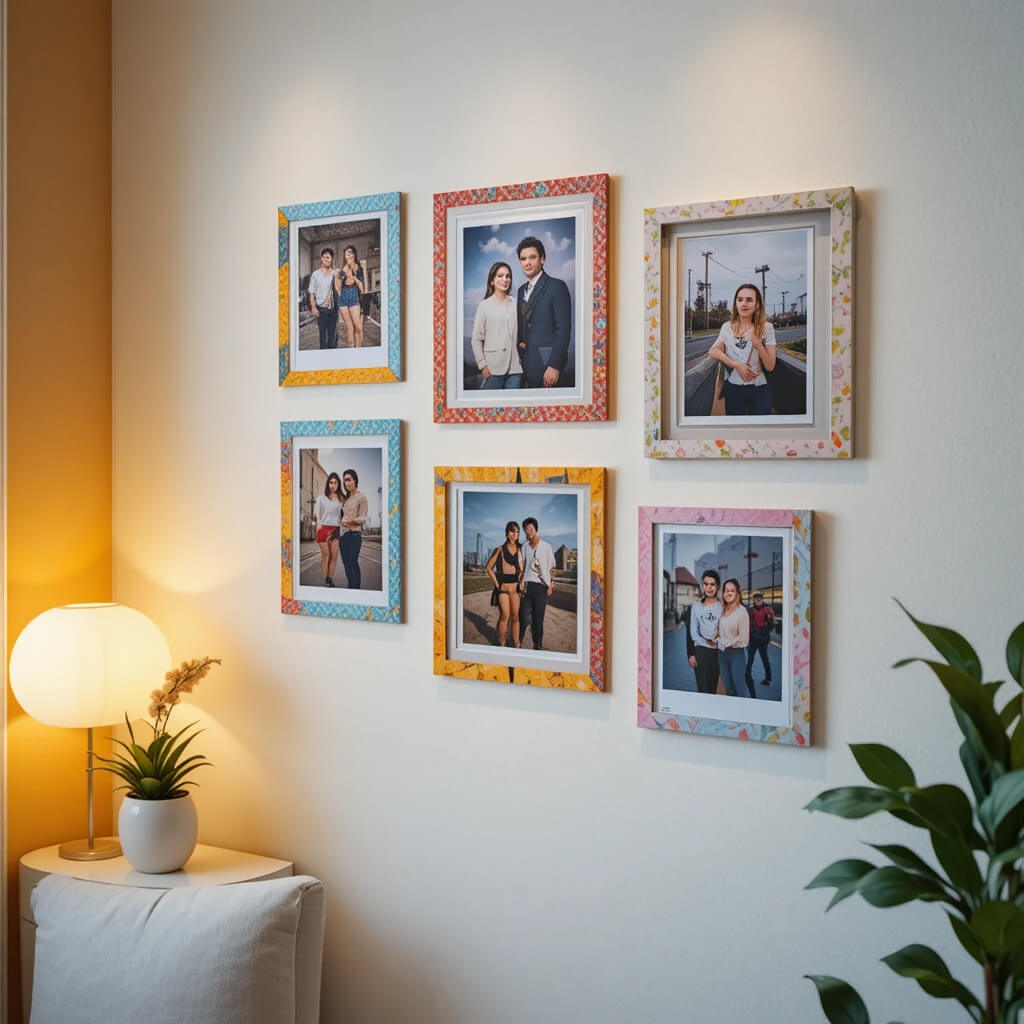
3. Gallery Wall with Printable Art
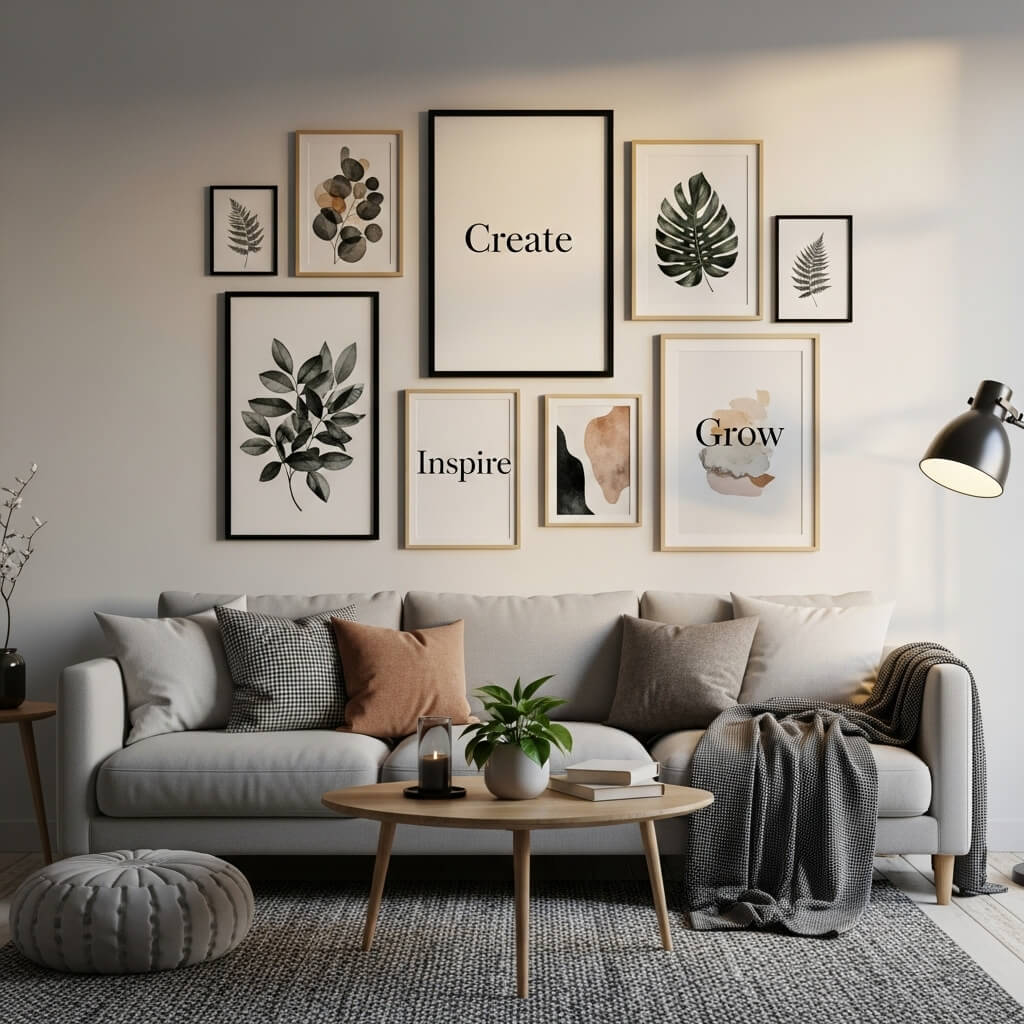
No skills? No problem. Printable art is a lifesaver. There are countless free or low-cost digital prints online.
Steps to Create a Gallery Wall:
- Choose a theme (botanical, abstract, or typography).
- Print and frame your favorites.
- Arrange on the wall before nailing to find the perfect layout.
Styling Tip: Mix frames of different sizes and colors for a dynamic look. For a Pinterest-worthy vibe, leave some white space to prevent the wall from feeling cluttered.
4. Painted Canvas Art: Abstract Fun
You don’t need a degree in art to make beautiful abstract canvases. Just pick your favorite colors and let your creativity flow.
- Materials Needed:
- Canvas
- Acrylic paint
- Brushes or palette knives
How to Do It:
Choose 2–3 colors that complement your room.
- Apply paint in broad strokes, dots, or splashes.
- Layer colors and textures until you love the result.
- Pro Tip: Stand back every few minutes to see the overall effect. Sometimes less is more!
5. DIY Fabric Wall Hangings: Boho Chic
Nothing says cozy and chic like a handmade fabric wall hanging. It’s perfect for bedrooms or living rooms.
Materials:
- Wooden dowel
- Yarn, rope, or fabric strips
- Scissors
Steps:
- Cut your yarn or fabric to desired lengths.
- Tie or weave them onto the dowel.
- Hang it on the wall using string or hooks.
Styling Tip: Mix textures—think soft yarn, sleek rope, or even leftover fabric scraps. It adds depth and a tactile element to your wall.
6. Pressed Flowers in Shadow Boxes
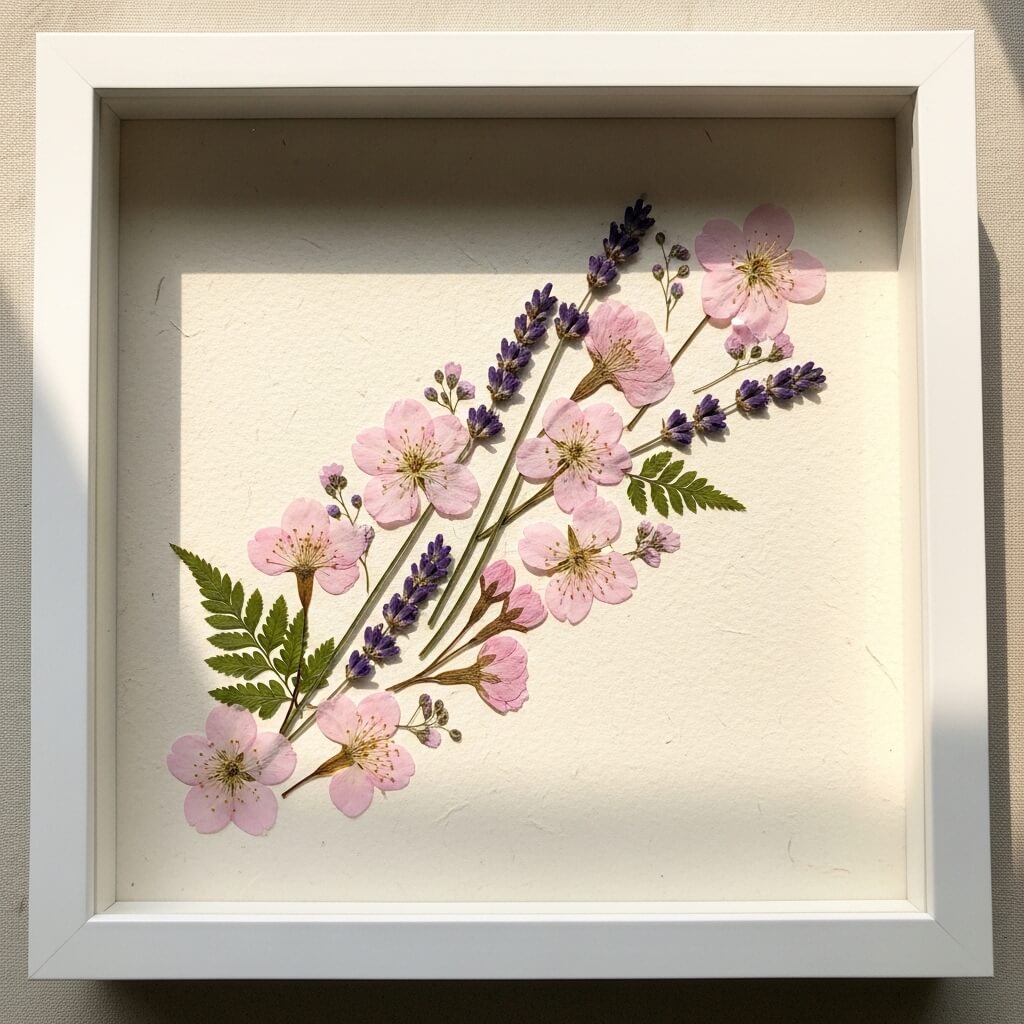
Bring a touch of nature indoors with pressed flowers. It’s delicate, romantic, and surprisingly simple.
What You’ll Need:
- Fresh flowers
- Heavy books (for pressing)
- Shadow boxes
- Tweezers
Instructions:
- Press flowers in a heavy book for 1–2 weeks.
- Carefully place them in shadow boxes.
- Arrange in a pattern or randomly for a whimsical look.
Pro Tip: Mix flowers of different sizes and colors for a garden-in-a-box vibe. These look stunning in bathrooms or near windows.
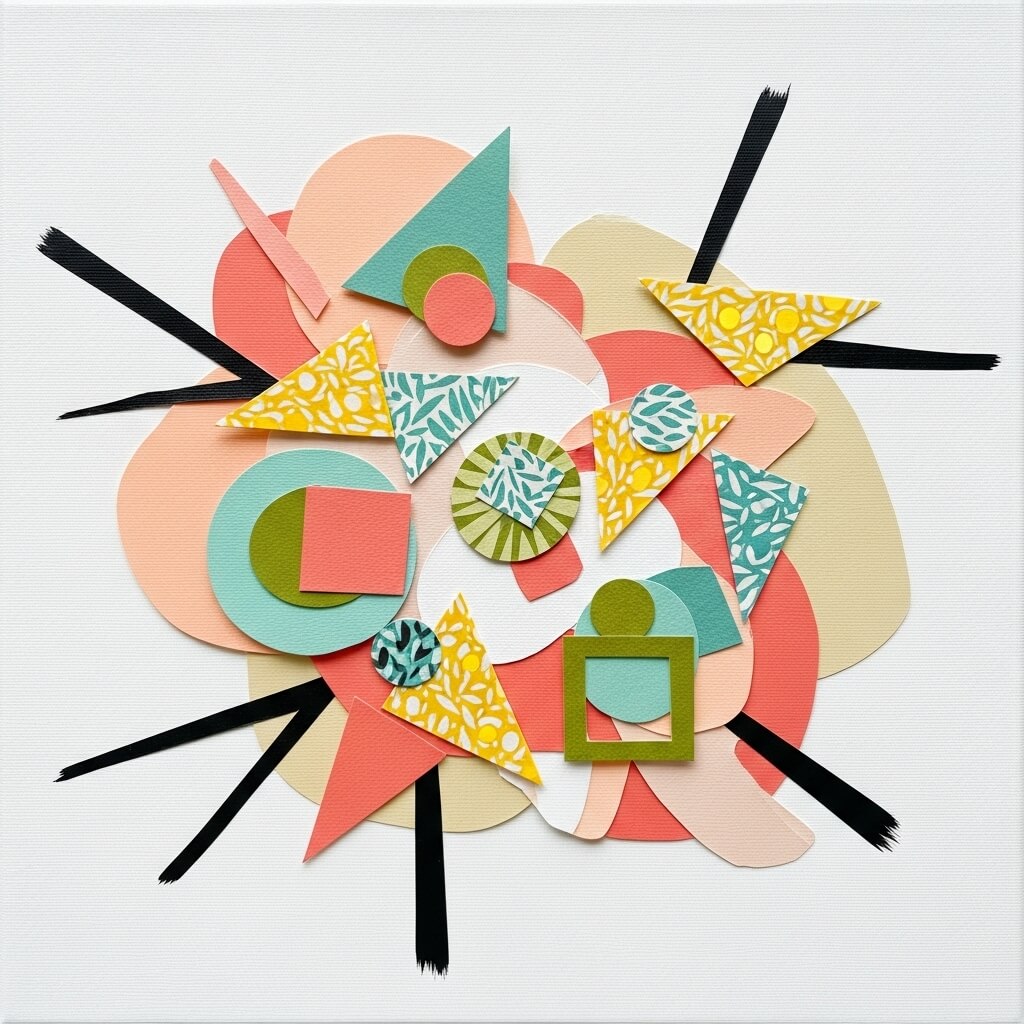
7. 3D Paper Art: Sculptural & Fun
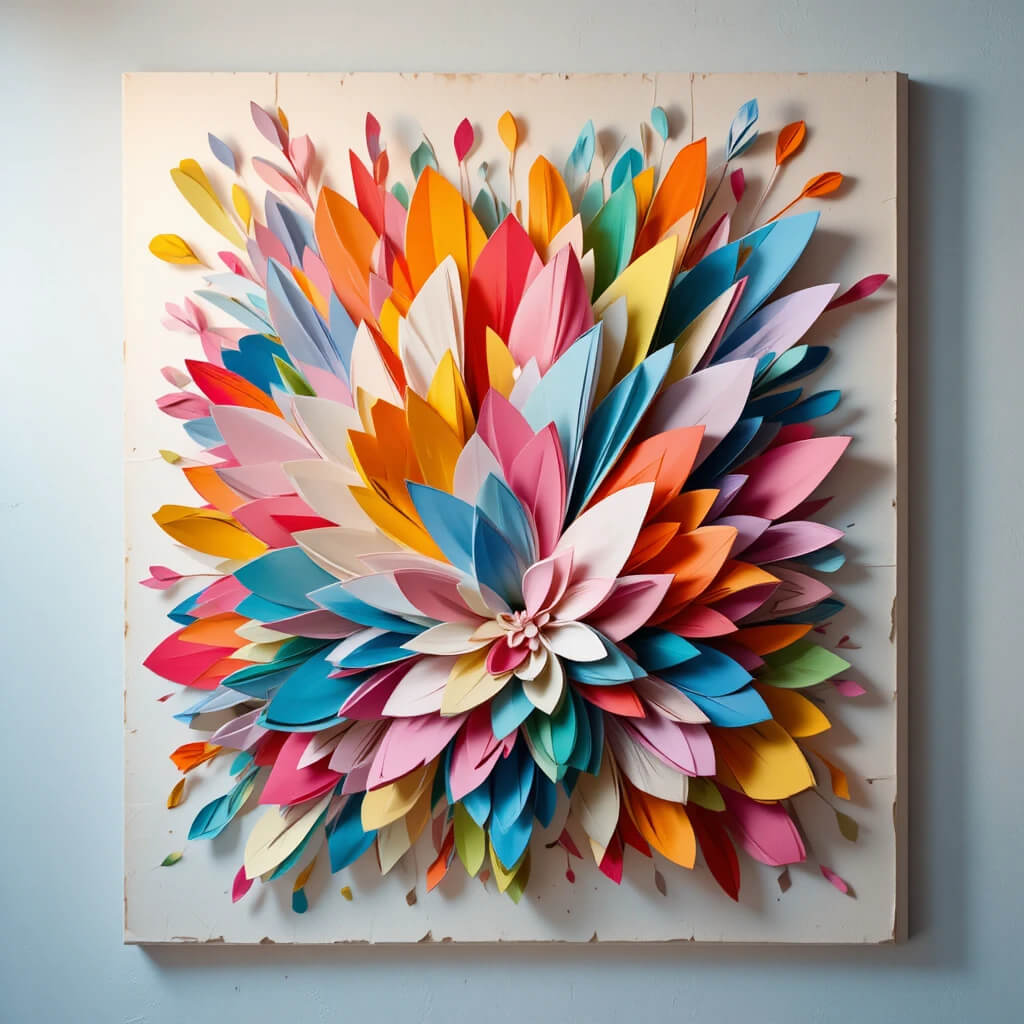
Paper isn’t just for scrapbooking—turn it into stunning wall art. Think origami, layered shapes, or folded geometric designs.
Steps to Try:
- Cut or fold colorful cardstock into shapes.
- Glue shapes onto a canvas or directly on the wall.
- Play with depth—some pieces can pop out for a 3D effect.
Styling Tip: Metallic papers add a touch of glam, while pastels keep things soft and modern.
8. DIY Wall Decals: Stickers with Personality

Wall decals aren’t just for kids’ rooms. You can create your own using vinyl sheets or even contact paper.
Ideas:
- Simple shapes like stars, hearts, or triangles
- Motivational quotes in cute fonts
- Custom patterns that match your décor palette
Pro Tip: Plan your design on paper first, then transfer to the wall. This ensures your pattern is balanced and visually appealing.
9. Framed Fabric Panels: Texture & Color
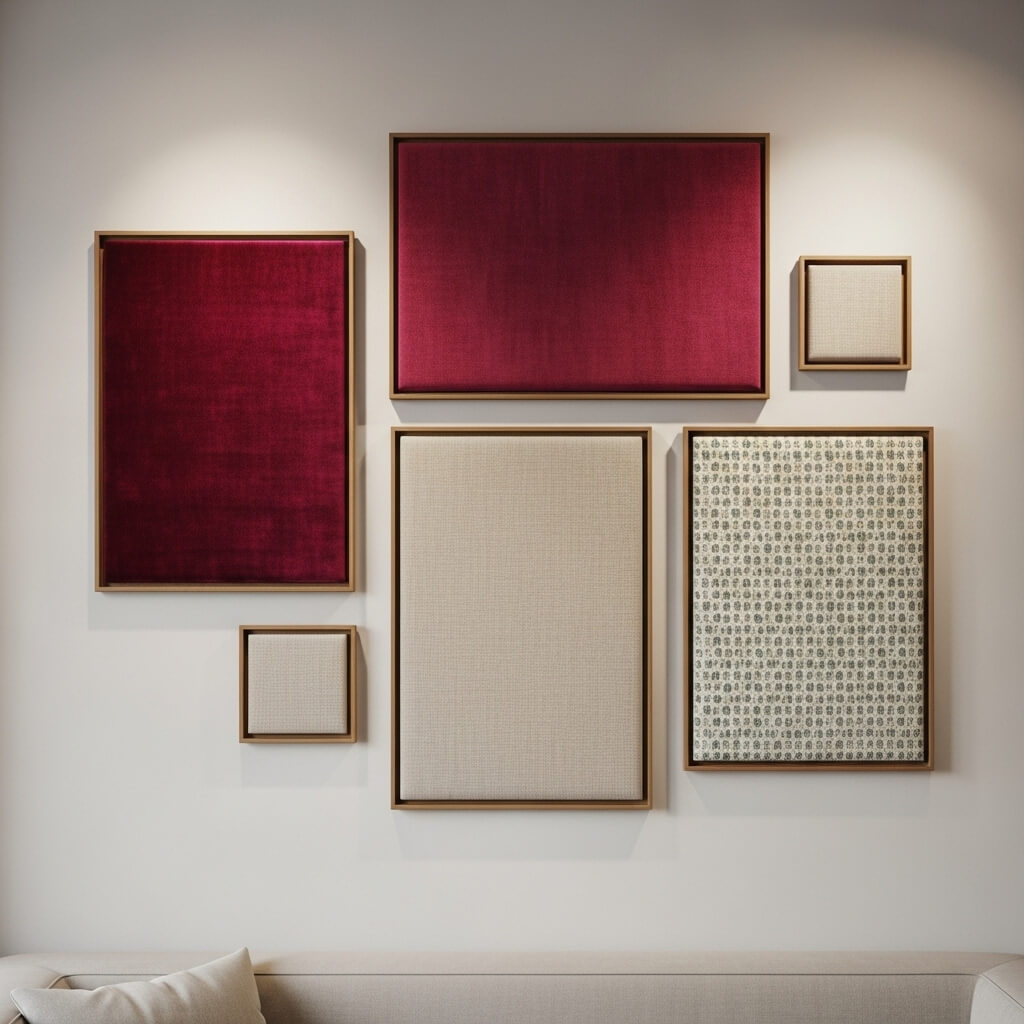
Instead of traditional art, consider framing beautiful fabric. It instantly adds color and texture.
How to Do It:
- Choose a fabric with a pattern you love.
- Stretch it over a frame or canvas.
- Secure the edges with glue or staples.
Styling Tip: Try mixing different fabrics in a gallery-style arrangement. Velvet, linen, and patterned cotton together create a tactile masterpiece.
10. Painted Wooden Slices: Rustic Charm
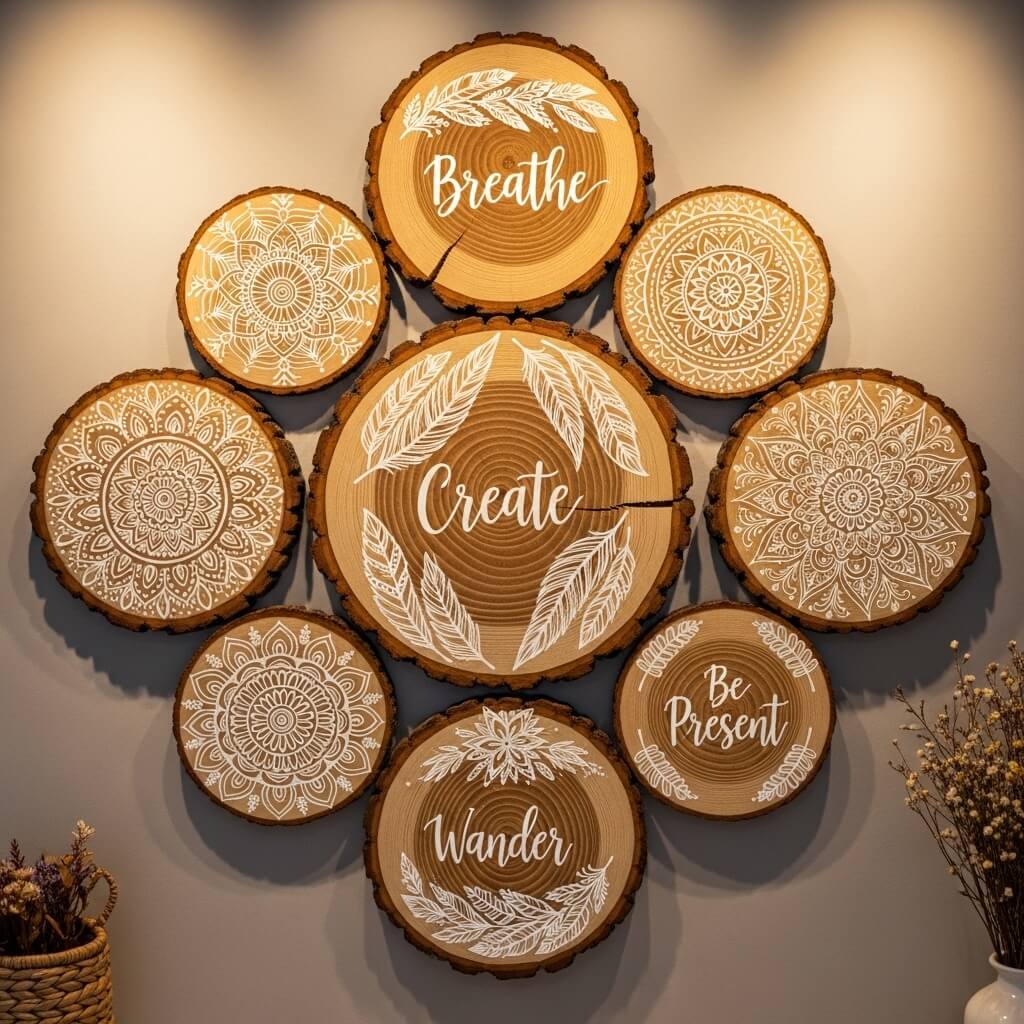
For a farmhouse or rustic vibe, wooden slices are perfect. Paint them with quotes, patterns, or abstract designs.
Steps:
- Sand wooden slices smooth.
- Paint your design with acrylic paint.
- Hang with nails or string.
Pro Tip: Natural wood grain adds character, so embrace the imperfections—they make your art unique!
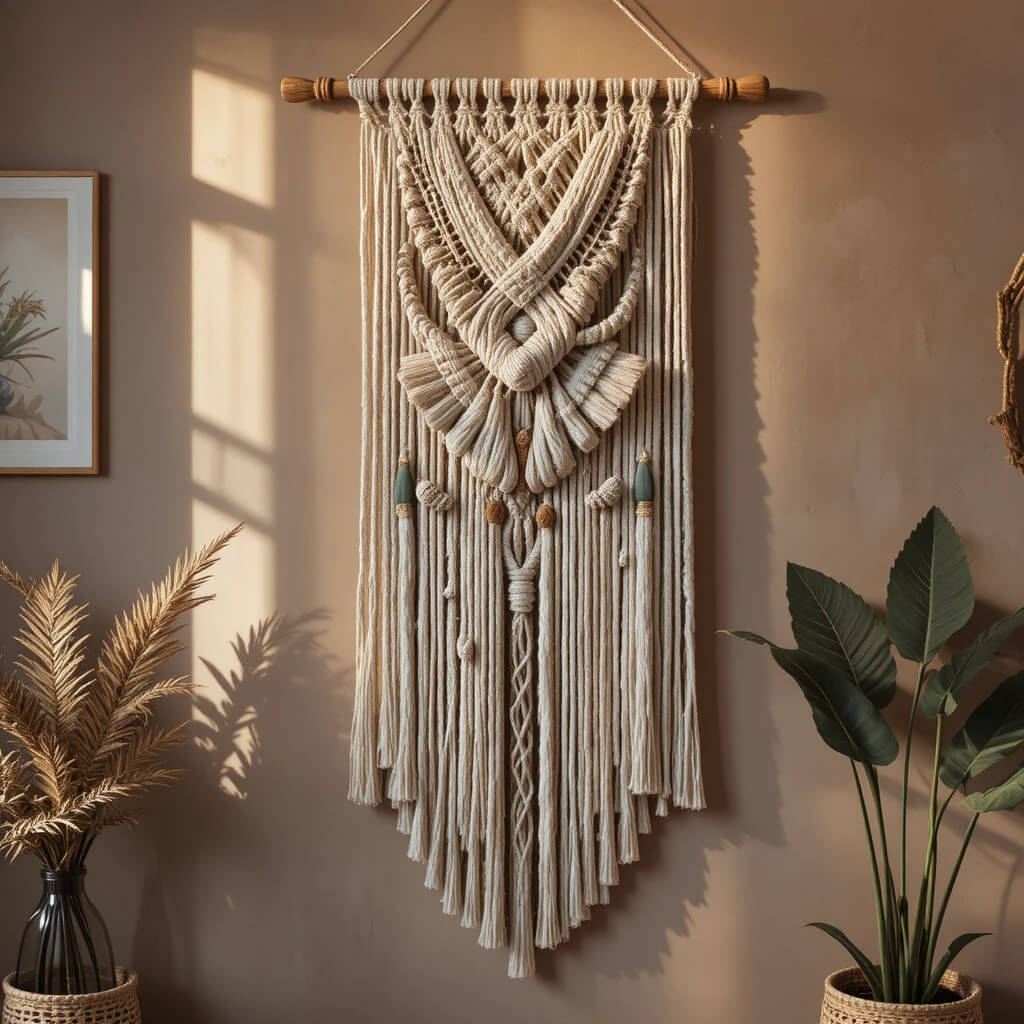
11. DIY Macramé Wall Hanging: Boho Goals
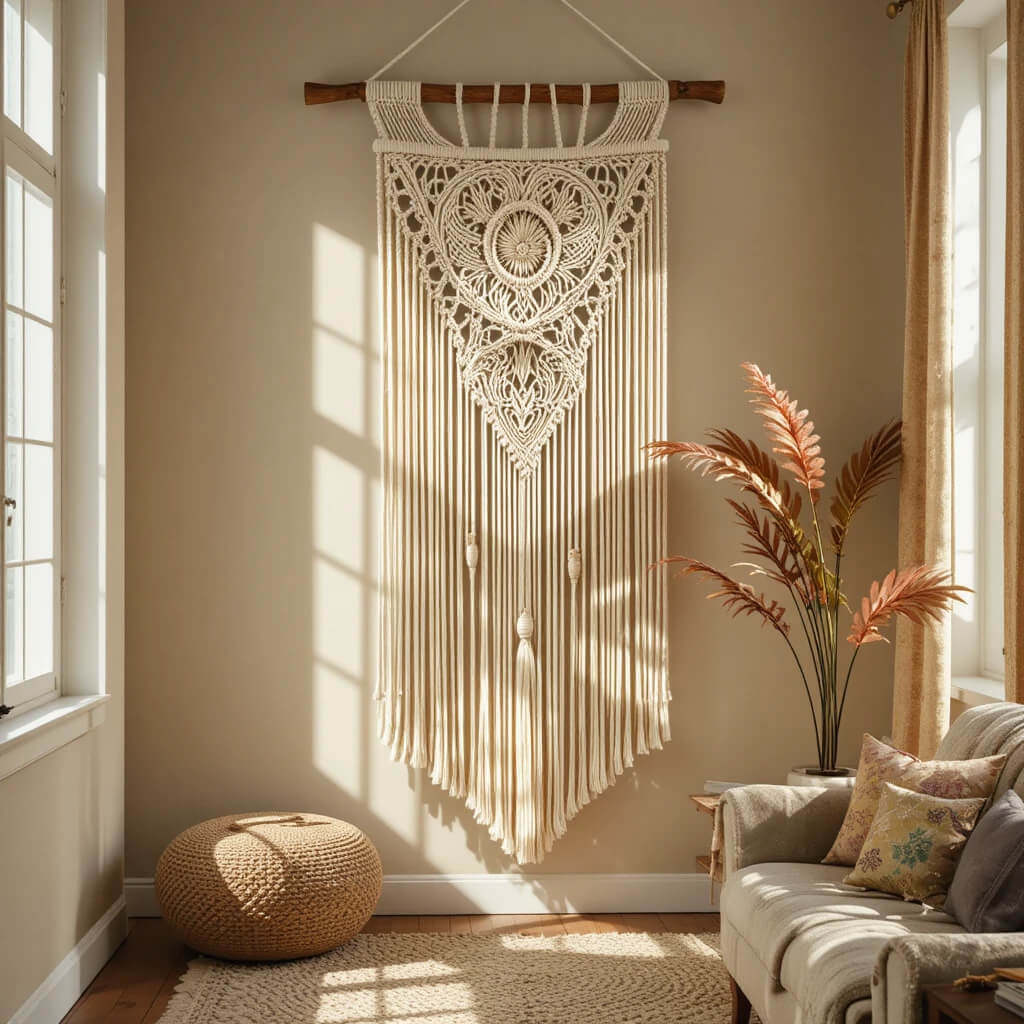
Macramé might seem intimidating, but beginner-friendly knots are easy to master.
Materials:
- Macramé cord
- Wooden dowel or branch
- Scissors
Basic Steps:
- Learn 2–3 simple knots (square knot, lark’s head, and half hitch).
- Combine knots into a simple wall hanging.
- Hang in your favorite spot.
Styling Tip: Add beads or feathers for a whimsical touch. Macramé looks especially dreamy over beds or couches.
12. Washi Tape Photo Frames: Minimal Effort
If you love a minimalist look, make DIY frames for your photos using washi tape. It’s simple, fun, and leaves zero damage.
Steps:
- Pick a set of photos you love.
- Tape borders directly onto the wall.
- Play with angles and colors for a modern gallery feel.
Pro Tip: Keep it uniform for a sleek aesthetic, or mix it up for a fun, eclectic vibe.
13. DIY Canvas Quote Art: Words That Inspire
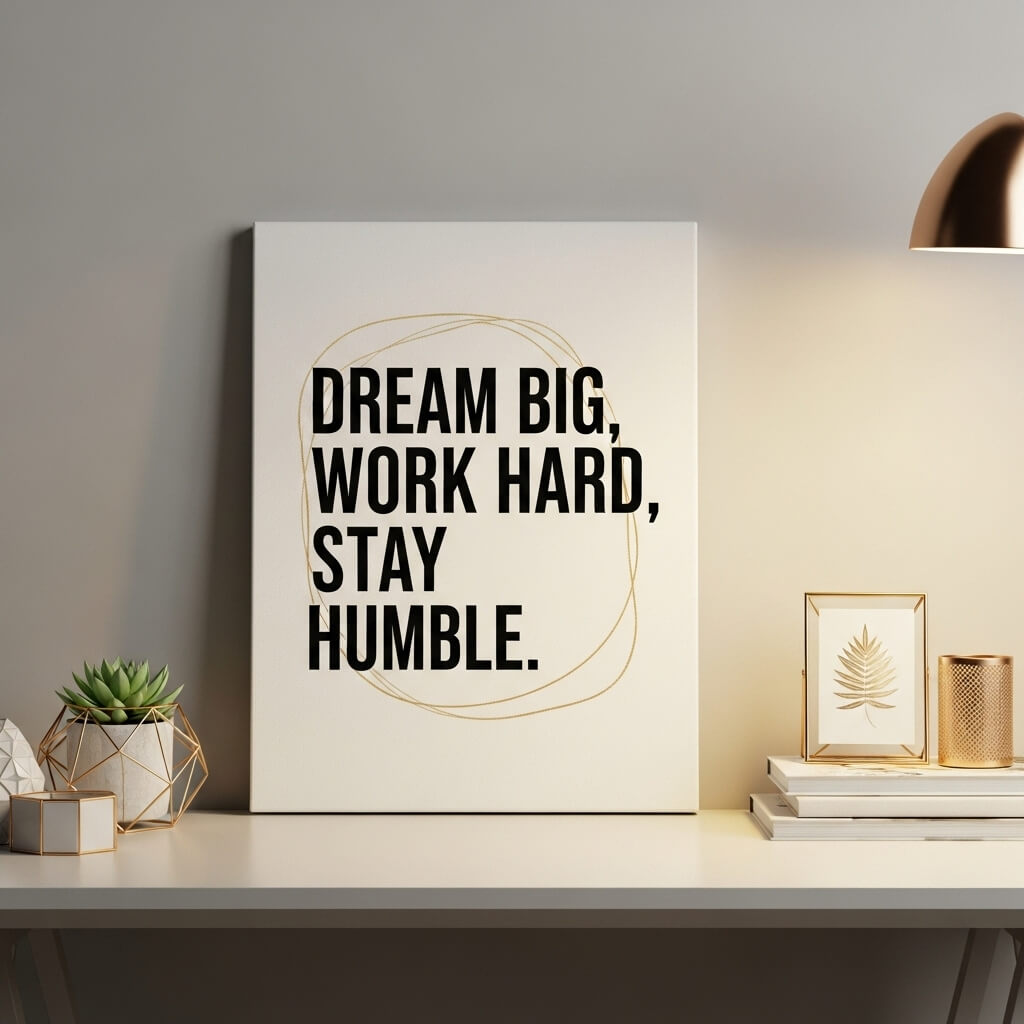
Who doesn’t love a motivational wall? DIY quote art is easy, even if you don’t have fancy lettering skills.
Materials:
- Canvas or paper
- Acrylic paints or markers
- Stencils (optional)
Steps:
- Choose a quote that resonates with you.
- Lightly sketch it on your canvas.
- Fill in letters with paint or markers.
Styling Tip: Pair with small abstract designs or gold accents to elevate the look. Perfect for offices, bedrooms, or entryways.
14. Upcycled Material Art: Eco-Friendly Fun
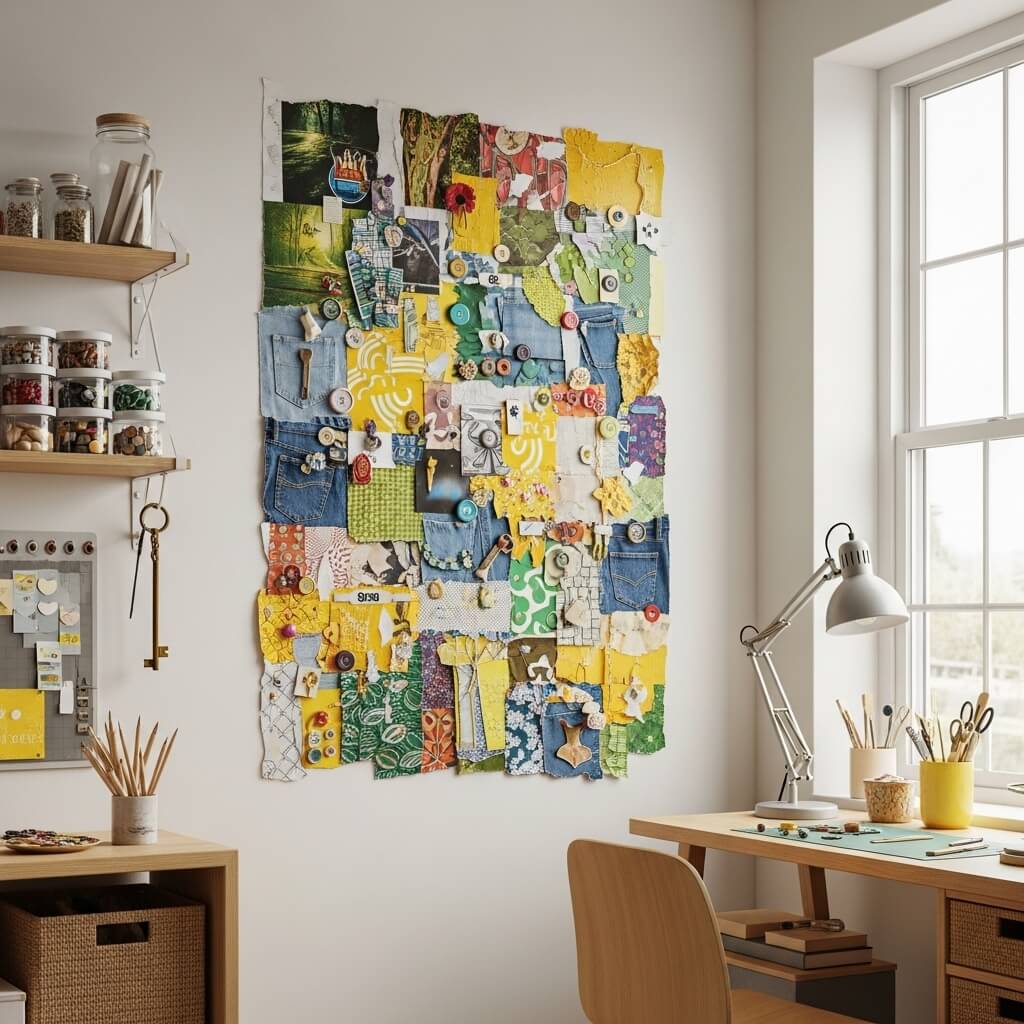
Use old materials around the house for wall décor. Think bottle caps, magazine pages, or scraps of fabric.
Ideas:
- Collage of old magazine clippings
- Wall art from broken jewelry pieces
- Textured patterns using fabric scraps
Styling Tip: Keep a consistent color palette so the final piece looks cohesive and intentional.
15. DIY Chalkboard Wall: Interactive & Fun
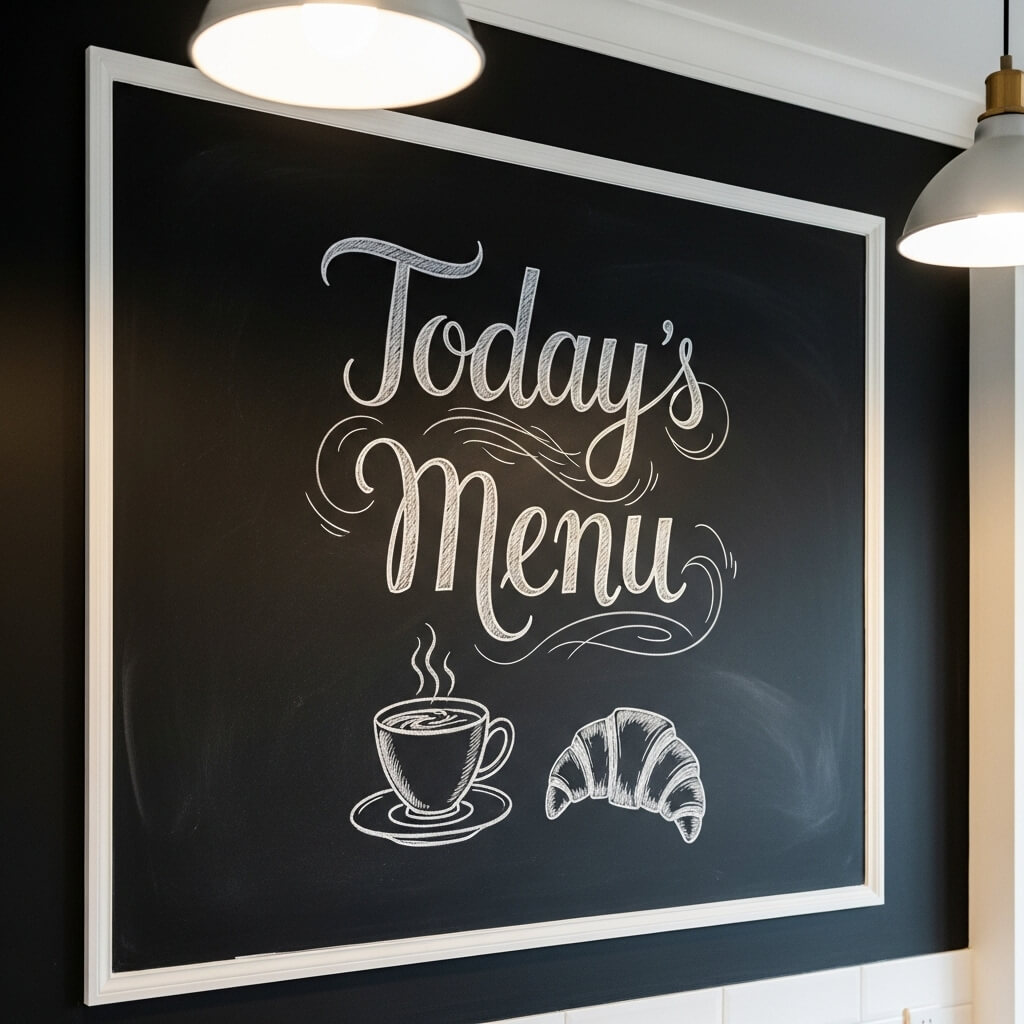
A chalkboard wall is perfect for kitchens, kids’ rooms, or offices. It’s functional and decorative.
How to Do It:
- Paint a section of your wall with chalkboard paint.
- Draw patterns, quotes, or calendars.
- Update it whenever inspiration strikes!
Pro Tip: Frame the chalkboard with washi tape or wood trim for a polished, Pinterest-ready look.
16. Minimalist Line Art Prints
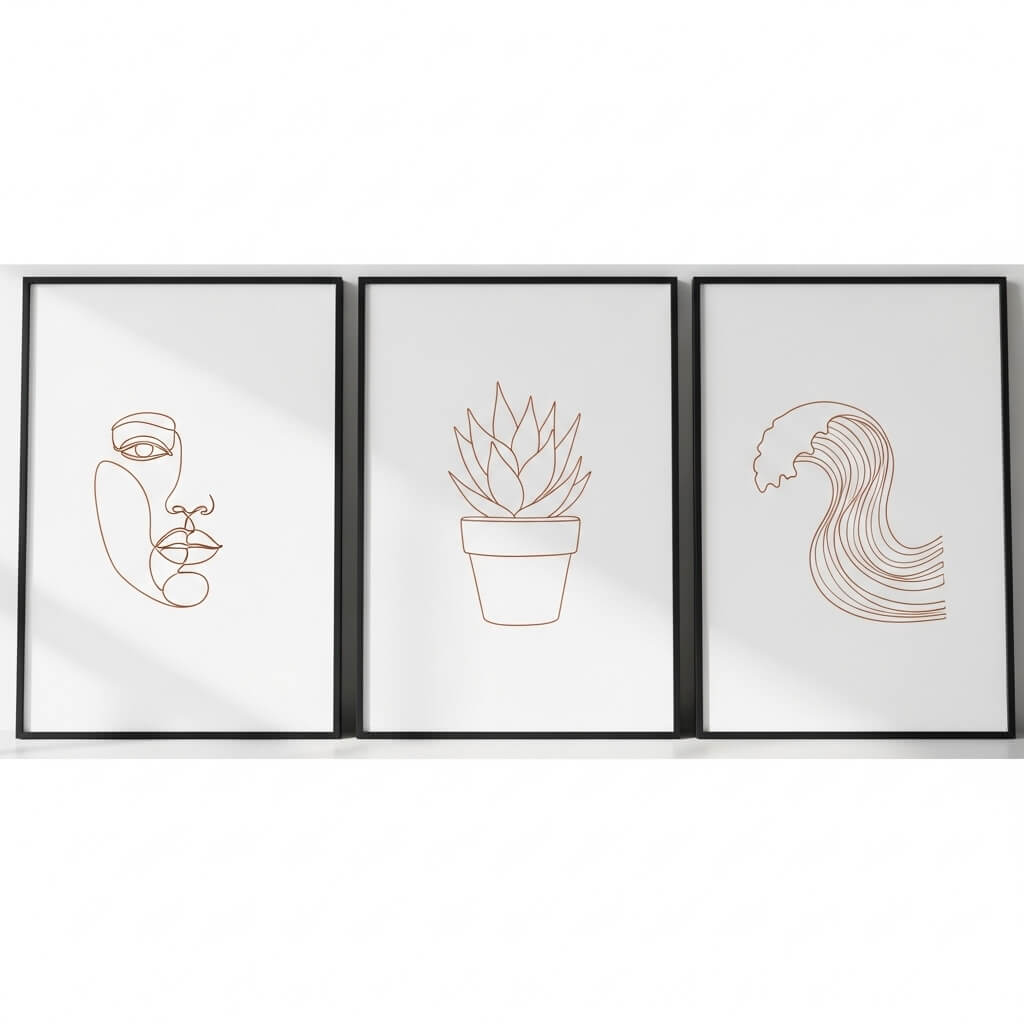
Line art is modern, chic, and ridiculously easy to DIY. You don’t need shading or perspective—just clean, simple lines.
Steps:
- Pick a simple subject (faces, plants, or abstract shapes).
- Draw freehand or use a stencil.
- Frame your work and hang it in multiples for a gallery effect.
Styling Tip: Black ink on white paper is classic, but don’t be afraid to use bold colors for a playful twist.
17. DIY Cork Board Art
Cork boards aren’t just for reminders—they can become a creative wall piece.
Ideas:
- Pin photos in a grid
- Create a mood board with fabric swatches, quotes, and color samples
- Paint the cork in patterns for extra flair
Pro Tip: Mix small cork tiles to create a textured, geometric design. Your wall becomes functional art!
18. Layered Paper Collages
Collage art is forgiving—you can’t really mess it up. Layer papers, textures, and colors for an eye-catching result.
Steps:
- Collect colored papers, magazine clippings, or fabric scraps.
- Layer them on a canvas using glue or mod podge.
- Add finishing touches like paint or markers.
Styling Tip: Use neutral tones for a calm vibe, or bright colors for a cheerful energy boost.
19. Wall Pocket Planters: Green & Chic
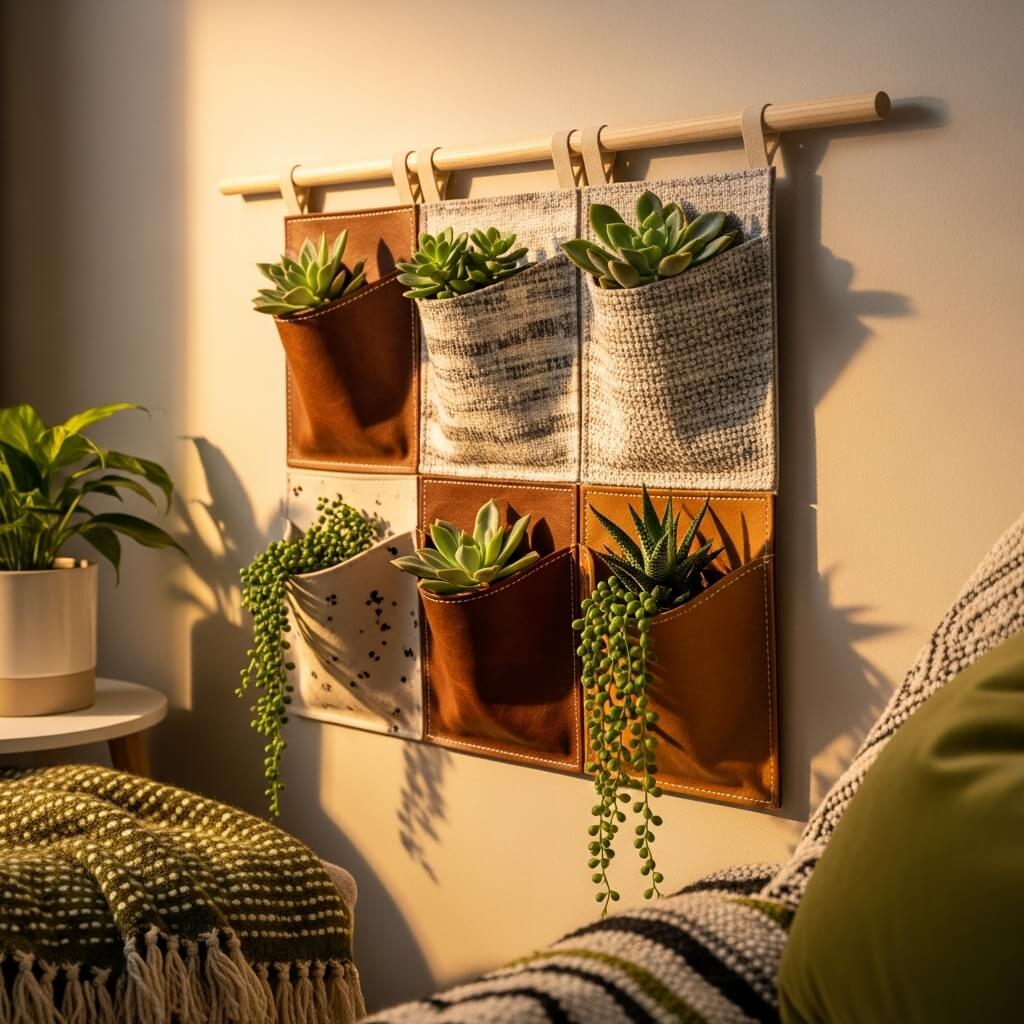
Bring life to your walls with DIY fabric or leather wall pockets for small plants.
Materials:
- Fabric or faux leather
- Wooden dowel
- Hooks
- Small succulents or faux greenery
Steps:
- Sew or glue pockets to hold plants.
- Attach the pockets to the dowel.
- Hang on the wall and insert your greenery.
Styling Tip: Mix heights and pocket sizes for a visually dynamic display. Perfect for entryways or kitchens.
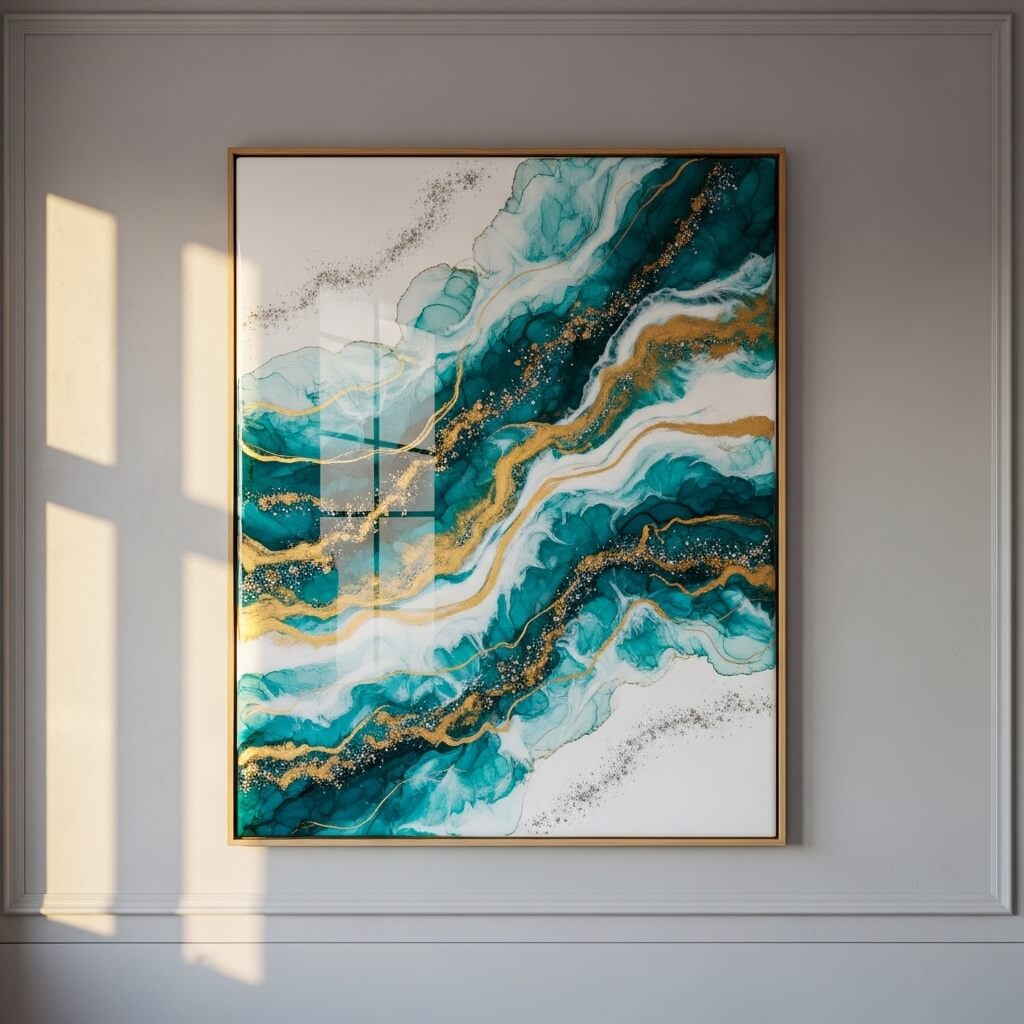
20. DIY Resin Art Panels
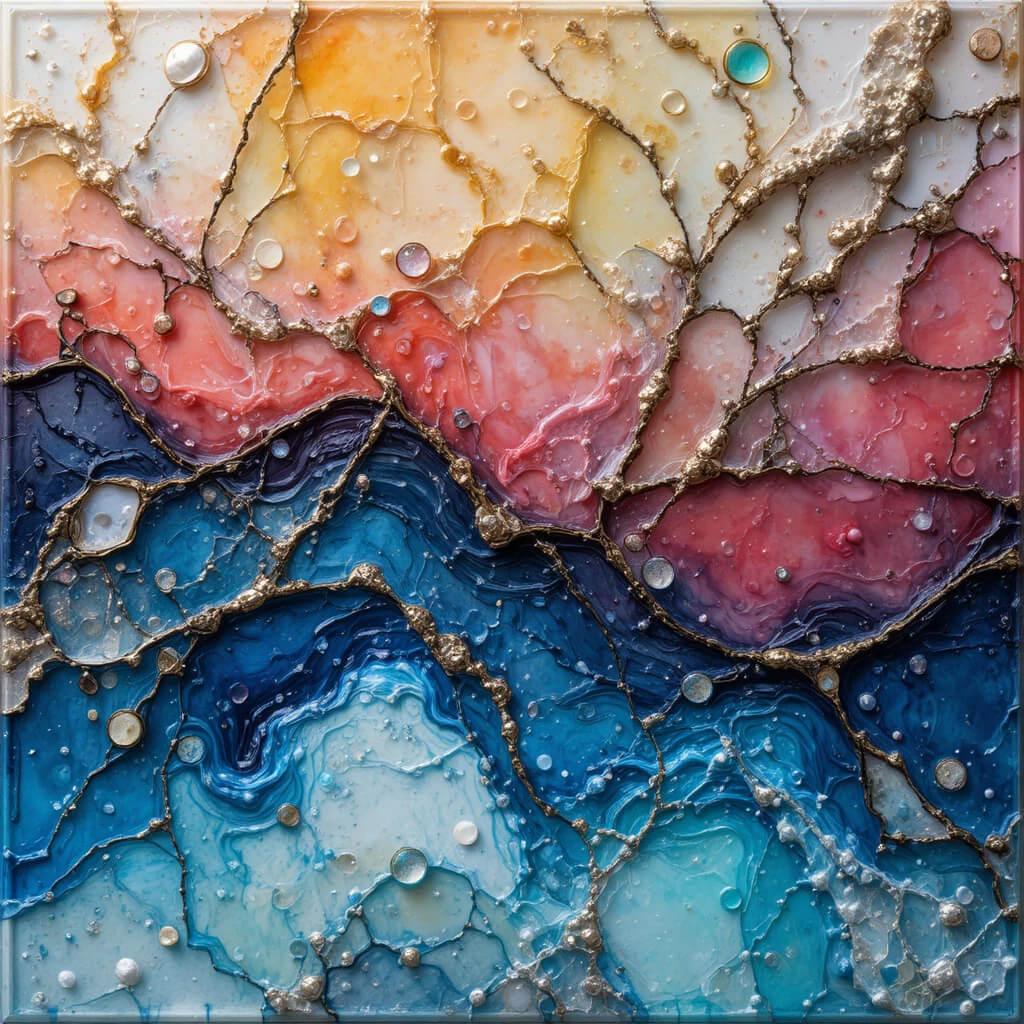
If you want to feel like a true artist without actual training, resin panels are your friend.
Materials:
- Epoxy resin
- Color pigments or alcohol inks
- Mold or wooden panel
Steps:
- Mix resin according to instructions.
- Add color pigments and pour onto panel.
- Tilt, swirl, and let it cure.
Styling Tip: Metallics or glitter in resin make your wall art shimmer under natural light. Perfect for statement pieces.
Conclusion: Your Blank Walls, Your Rules
There you have it 20 DIY wall art ideas anyone can make, no skills required. Whether you’re drawn to abstract paintings, cozy fabric hangings, or nature-inspired pressed flowers, there’s something here for every home and every mood.
Remember, DIY wall art is as much about the process as the result. Have fun experimenting, mix and match styles, and don’t stress about perfection. Your walls are a canvas for your personalitylet them shine!
Now it’s your turn to grab some supplies, get creative, and fill those blank walls with beautiful, unique art that tells your story. And if you want more home décor inspiration, check out our guides on budget-friendly living room makeovers, boho bedroom décor tips, and modern gallery wall ideas. Your Pinterest boards will thank you!
FAQs About DIY Wall Art
1: Do I need artistic skills to make DIY wall art?
Absolutely not! Many of these ideas—like string art, washi tape designs, and gallery walls—require minimal to zero artistic skills.
2: Can DIY wall art damage my walls?
Most ideas here are beginner-friendly and non-damaging. Use removable tape, light nails, or hooks to avoid holes or marks.
3: What is the cheapest DIY wall art option?
Washi tape designs, printable art, or upcycled material collages are all budget-friendly and look stylish.
4: How do I make my DIY art look Pinterest-worthy?
Focus on colors, textures, and balance. Mix frames, layers, and materials, and don’t forget white space to prevent clutter.
5: Can I update my DIY wall art easily?
Yes! Many DIYs, like chalkboard walls, washi tape designs, and fabric panels, can be updated or swapped out anytime.