18 DIY Floating Shelves You Can Build in an Afternoon
Hey there! So, you’re staring at a blank wall, dreaming of storage that doesn’t look like a storage unit, and your wallet is giving you the side-eye. I get it.
Let’s skip the expensive, flimsy store-bought shelves and talk about the real fun: building your own. The best part? You don’t need a PhD in carpentry or a month of Sundays. I’m talking one afternoon, basic tools, and a serious dose of satisfaction. Ready to turn that Pinterest board into reality?
1. The Classic 2×4 Shelf
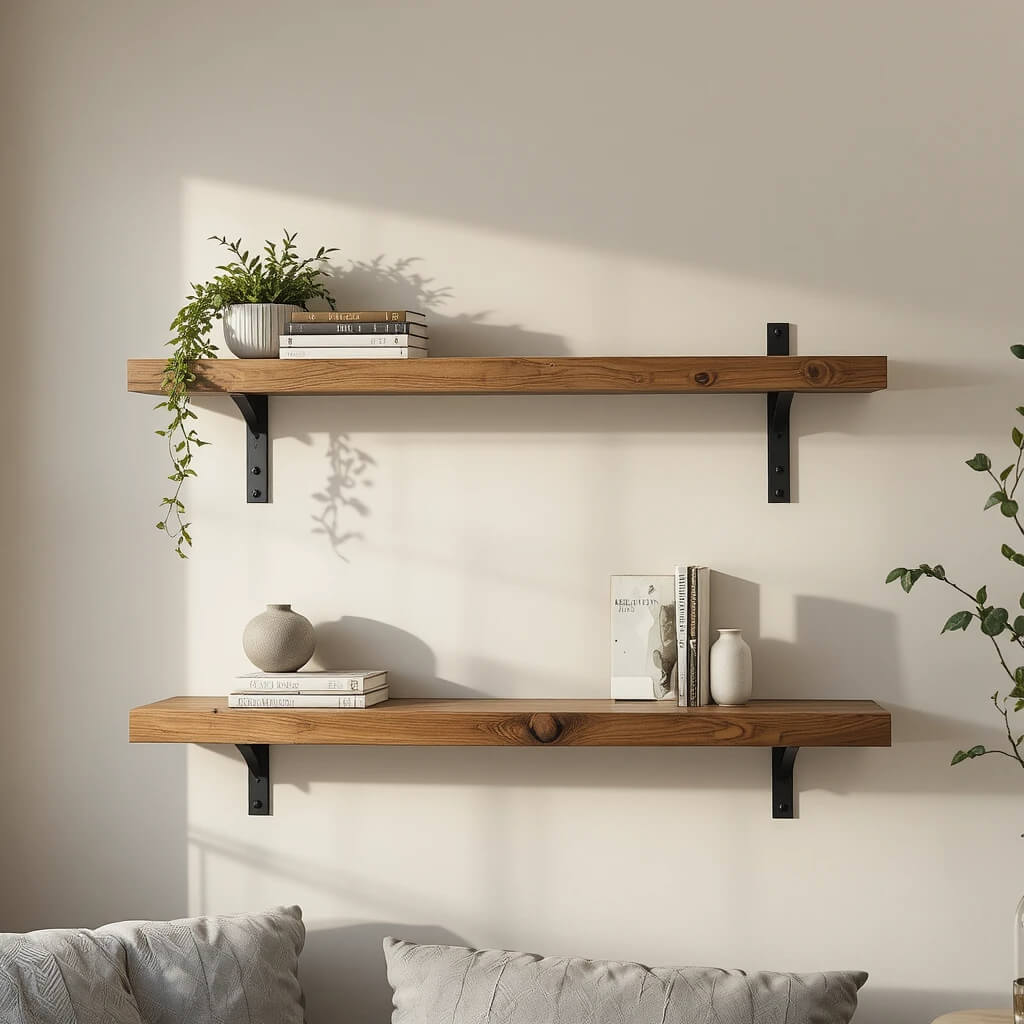
Grab a straight 8-foot 2×4 and a couple of sturdy brackets. Cut, sand, stain, and mount. You get a rugged, industrial look that can handle anything from books to potted plants. It’s the perfect starter project that feels incredibly legit.
Personal Fave: This was my very first build. I messed up the stain and it came out blotchy, but you know what? It gave it character. Imperfections just prove it’s handmade.
2. The Pipe & Wood Industrial Look
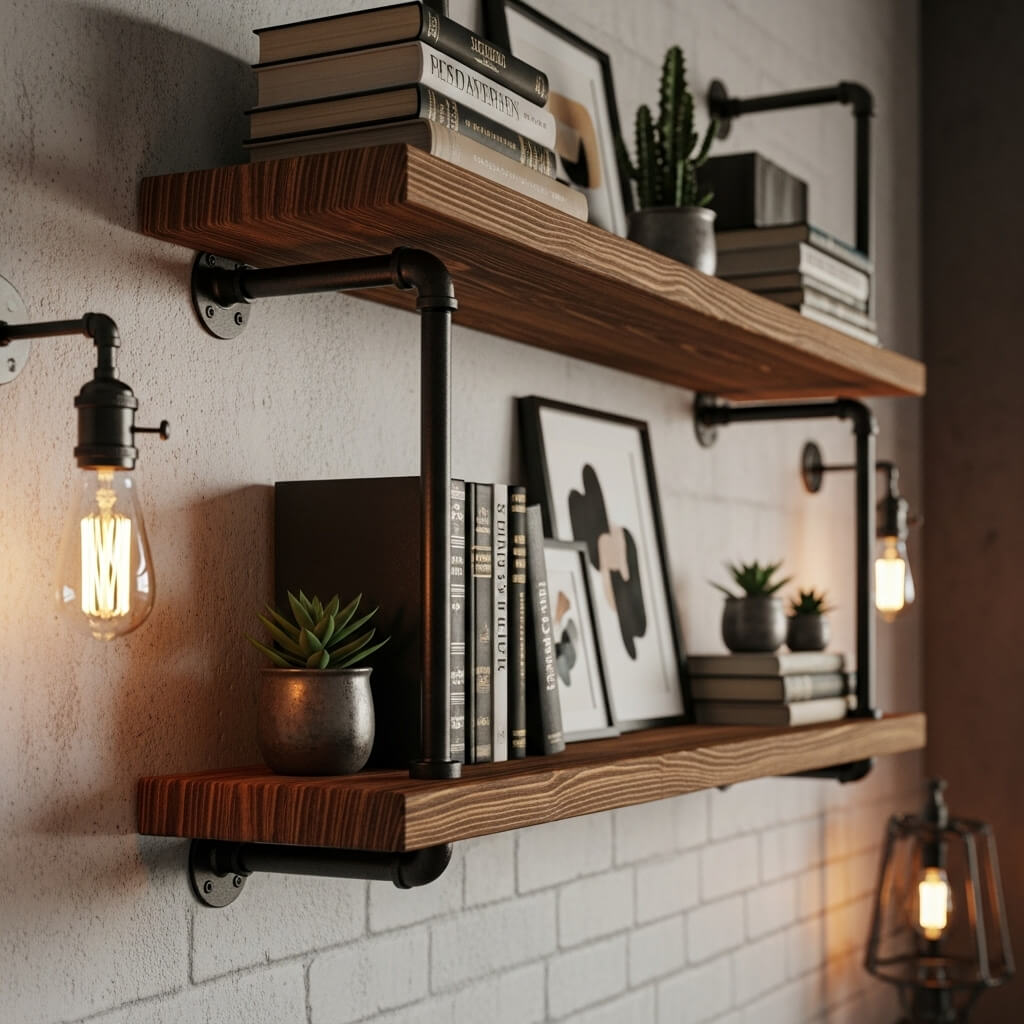
Use black iron pipe fittings from the hardware store as your brackets. Thread them together, attach a wooden plank on top, and boom—you’ve got instant loft vibes. It looks like you paid a boutique a fortune.
Pro Tip: Assemble the pipes first and mark your drill points. Chasing a wobbly pipe around the wall is a special kind of frustration I don’t recommend.
3. Reclaimed Barn Wood Floating Ledges
Got an old pallet or a piece of barn wood? Clean it up, add a hidden cleat (a strip of wood on the wall that the shelf notches onto), and you’re done. The wood does all the aesthetic heavy lifting for you.
Story Time: I once pulled a splinter from this project so big I swear it had its own age rings. Wear gloves, people.
4. The Invisible “Magic” Brackets
Buy those cool, hidden floating shelf brackets online. You screw a metal rod into the wall, slide a hollow shelf box right over it, and it looks like it’s defying gravity. Seriously satisfying magic trick.
Downside: You have to be super precise with your measurements. Get it wrong, and your magic trick is just a sad, wobbly box.
5. Simple Pine Boards with a Kreg Jig
If you own a Kreg Jig, you know it’s a game-changer. Use it to join the sides of a shelf box with pocket holes for a super clean, professional look. No visible screws, no fuss.
Pro Move: Pre-drill everything. It prevents the soft pine from splitting and saves you from uttering words you can’t take back.
6. The Rope-Suspended Shelf
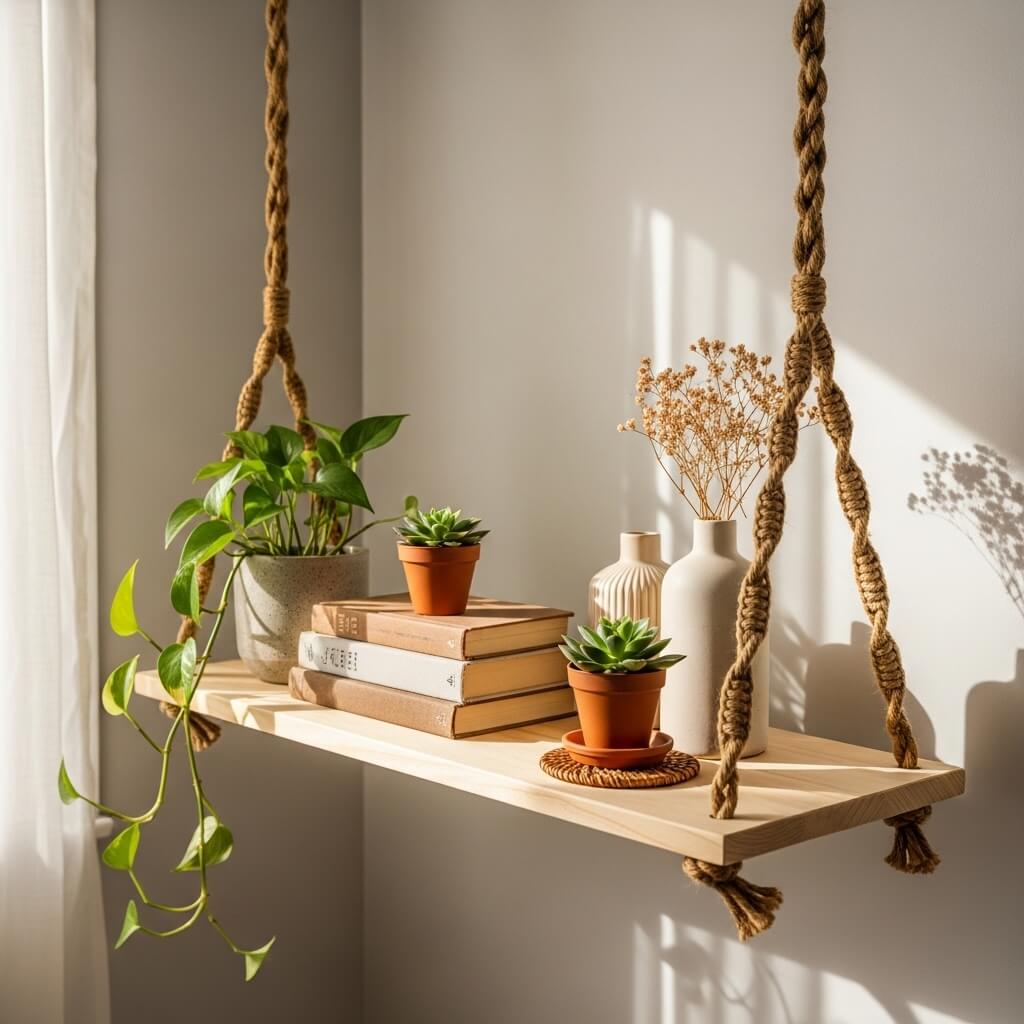
Drill four holes in the corners of a thick wood slab, run some sturdy nautical rope through, and knot it onto ceiling hooks. It’s a boho, playful look perfect for a corner.
Personal Take: IMO, this works best with lighter decor. Maybe don’t put your encyclopedia collection up there. Unless you’re going for the “sudden cave-in” aesthetic.
7. IKEA Hack: The BESTÅ Bracket Upgrade
Take a basic IKEA EKBY shelf (or any simple board) and swap its brackets for something more stylish. Paint them brass or spray them matte black for a custom look on a candy budget.
FYI: This is the ultimate “looks expensive, wasn’t” project. Your secret is safe with me.
8. The Crate & Barrel Look-Alike
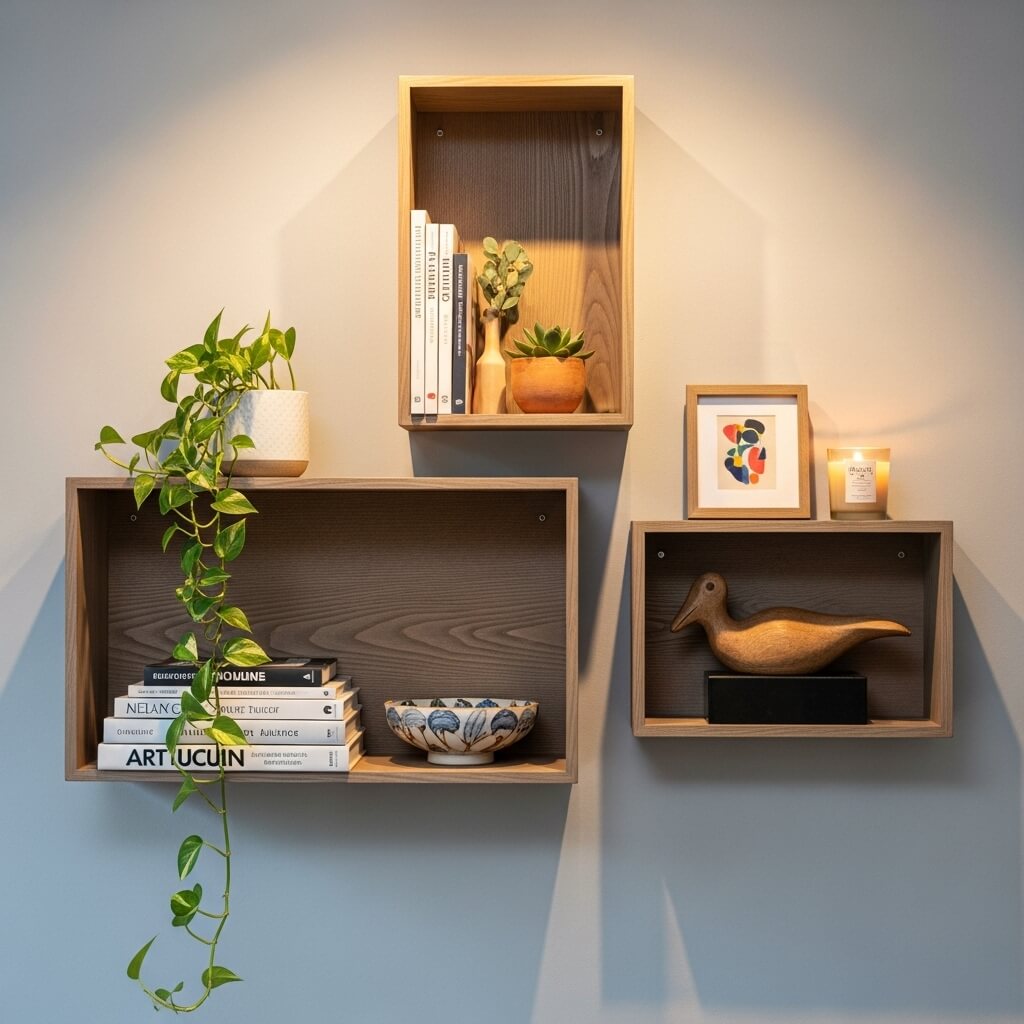
Stain or paint three simple wooden boxes and mount them in an asymmetrical cluster on the wall. It creates dynamic storage and looks way more thoughtful than a single shelf.
Pro Tip: Lay them out on the floor first to play with the arrangement. What looks good in your head might look chaotic on the wall.
9. The Thrifted Drawer Shelf
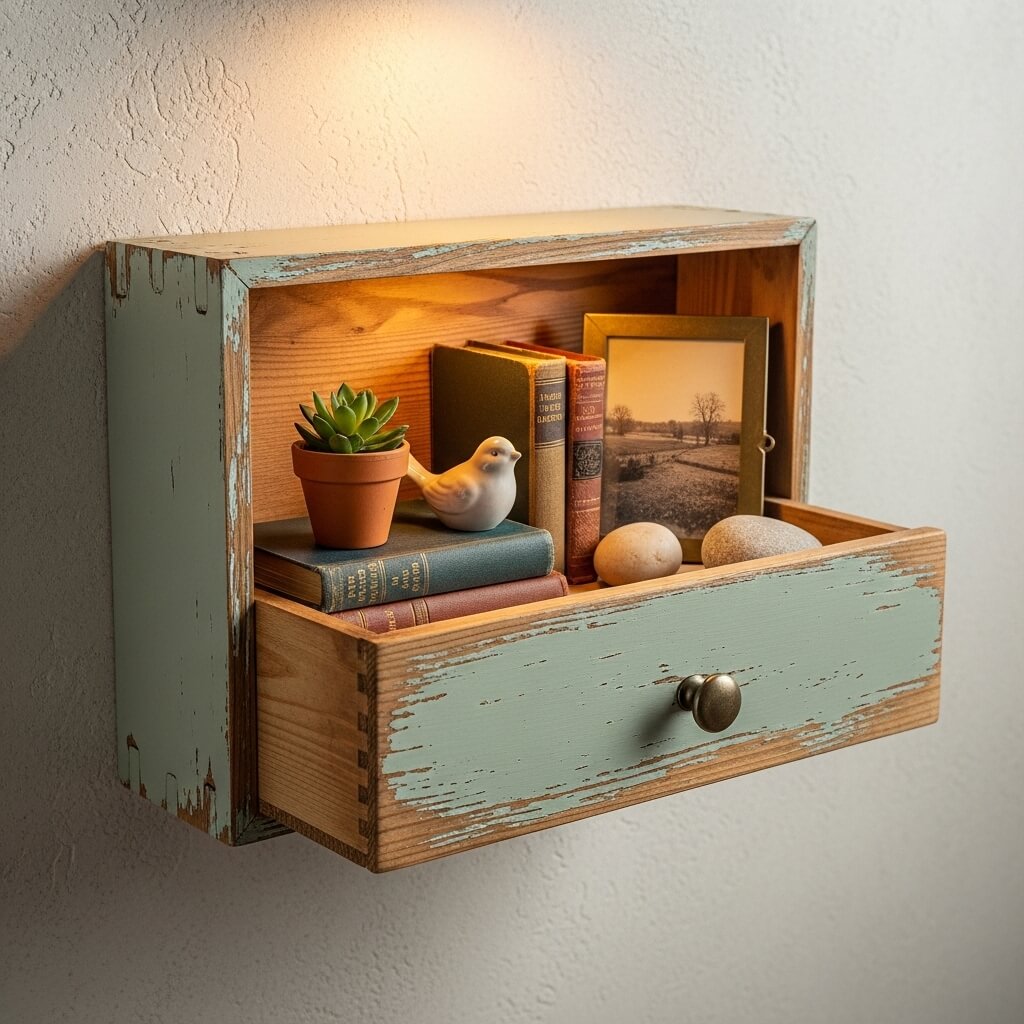
Find a cool old drawer at a thrift store, sand it, paint it, and attach it directly to the wall. Instant vintage charm with built-in sides! It’s already a box, so half the work is done for you.
Personal Fave: I found one with old painted flowers I couldn’t cover up. Now it’s my favorite quirky shelf. One person’s junk, right?
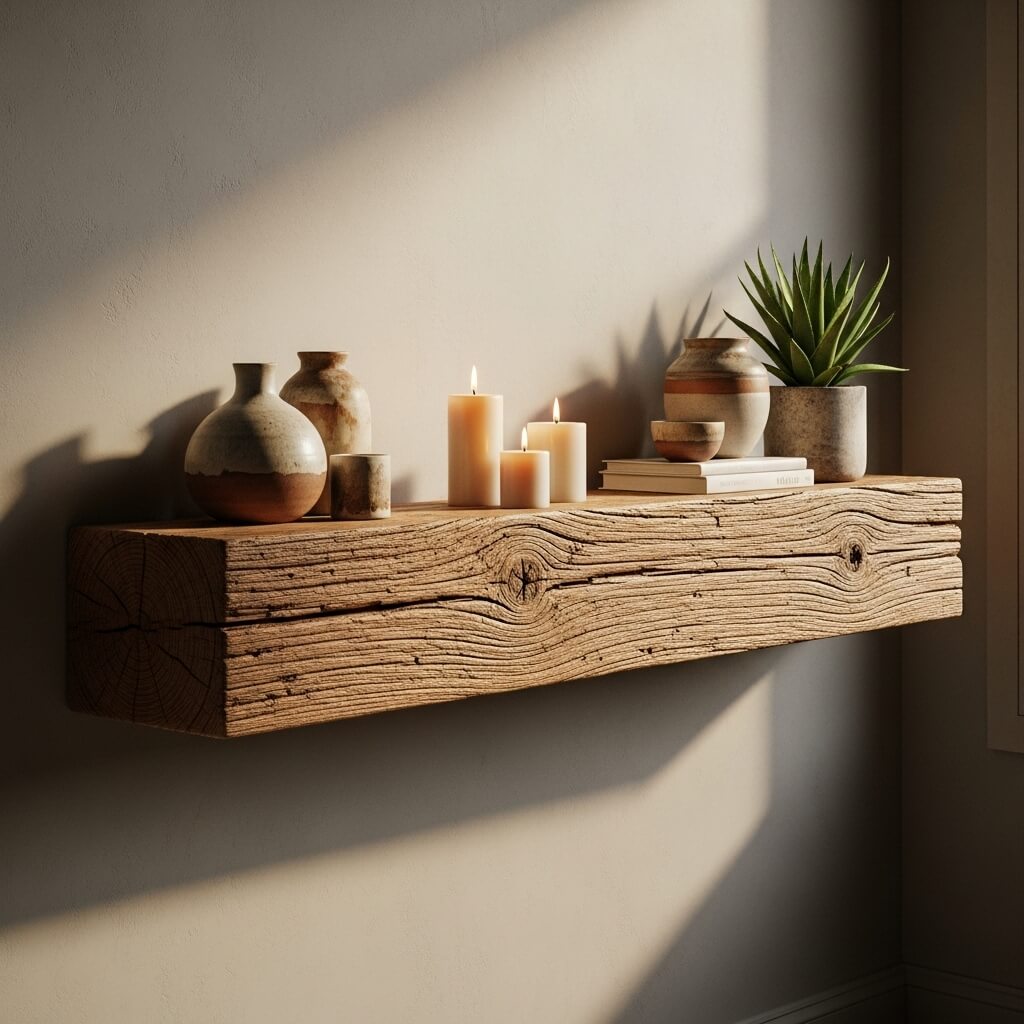
10. The Chunky Live Edge Slab
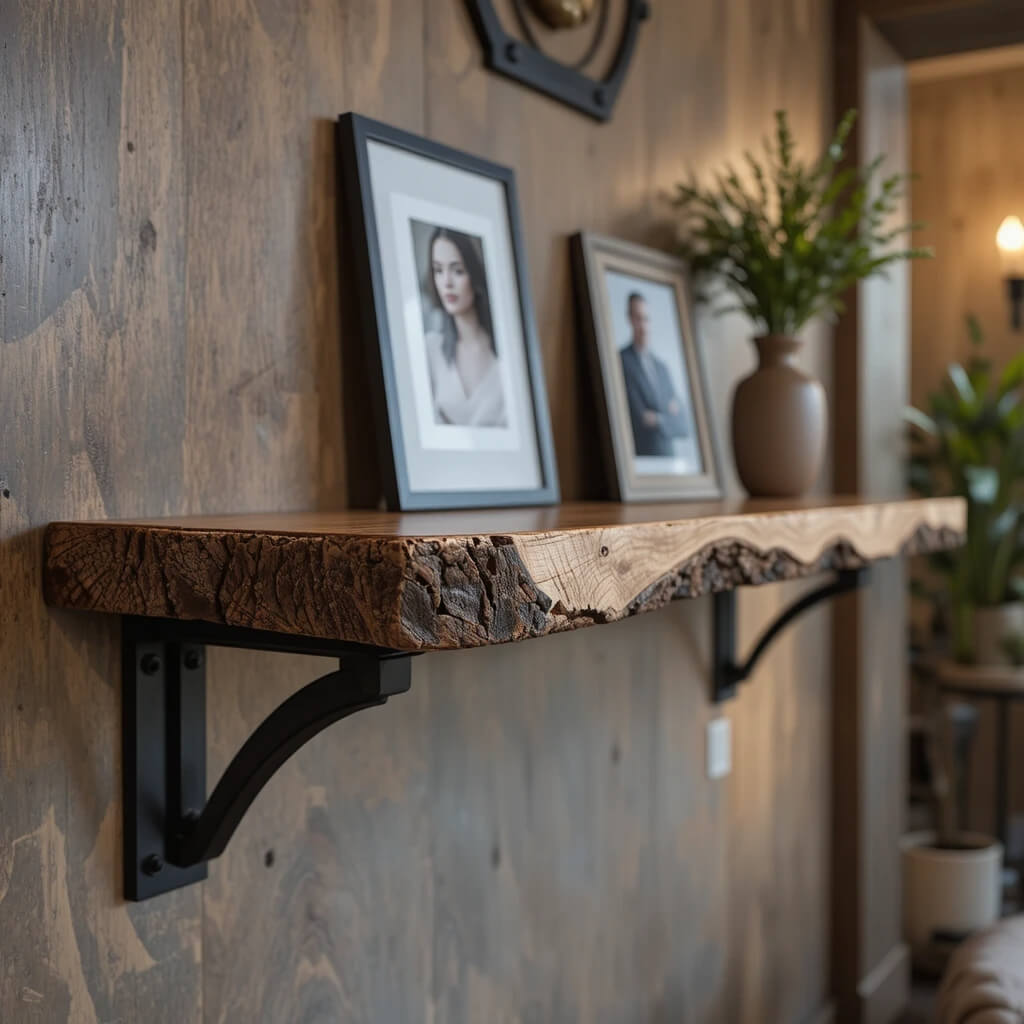
Secure a live edge wood slab onto heavy-duty L-brackets. This is a statement piece. The natural edge does all the talking, so keep the finish simple.
Downside: Good slabs can be pricey. But scouting local sawmills or fallen branches can score you a deal. Channel your inner lumberjack.
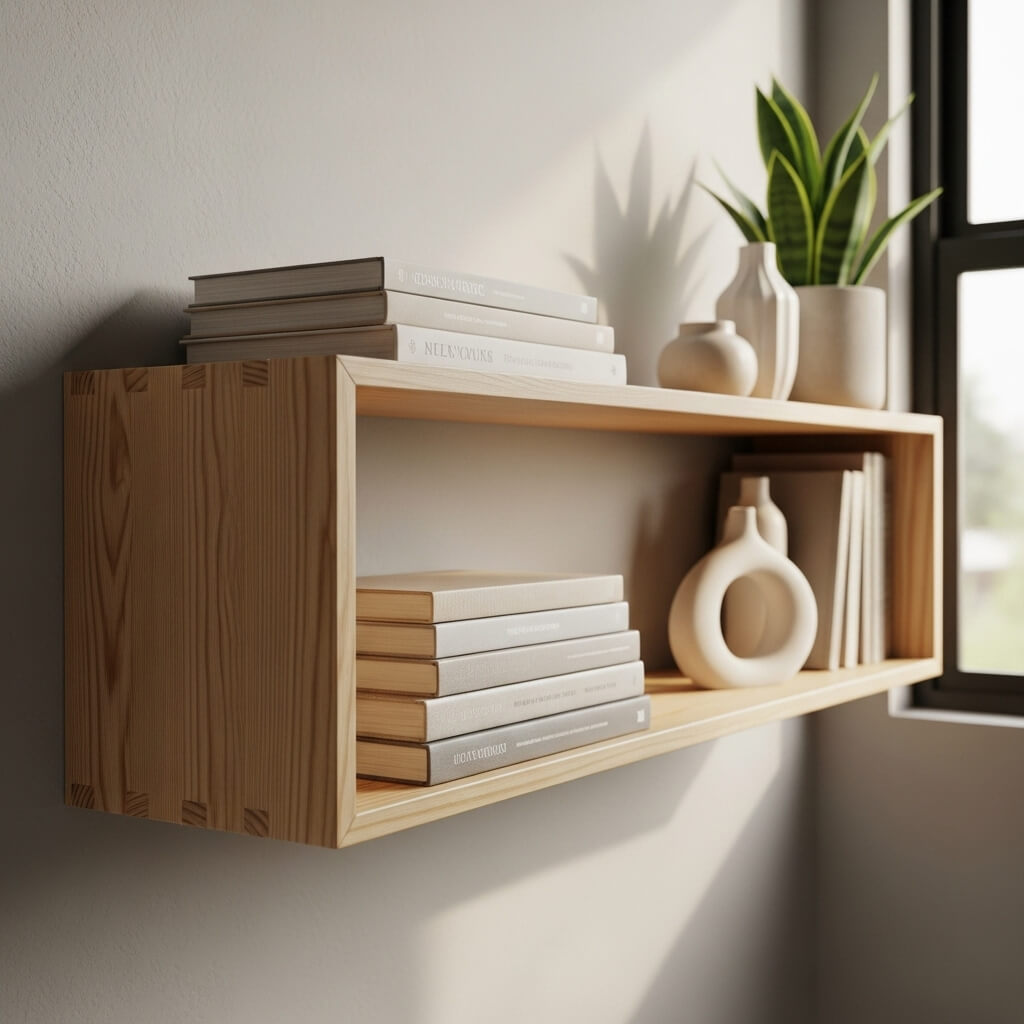
11. The Minimalist White Box
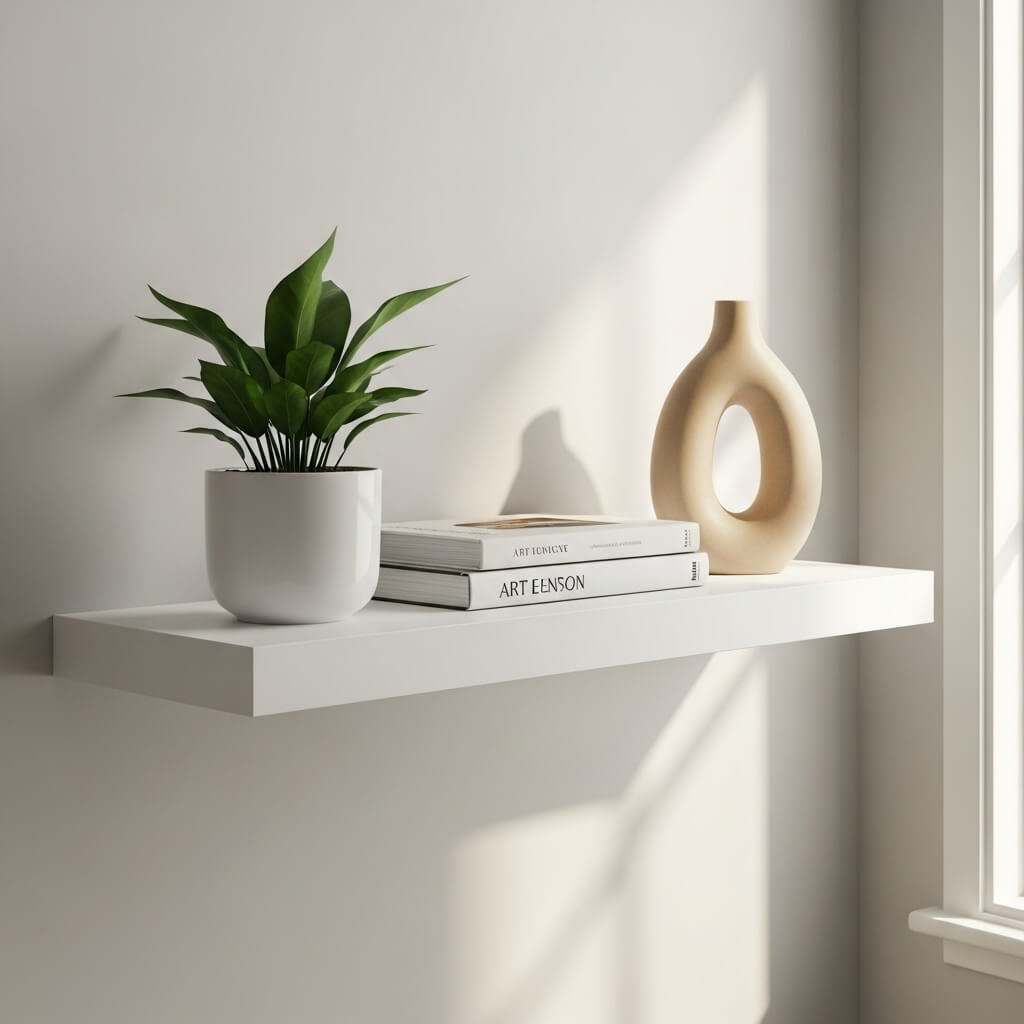
Build a basic box from 1×8 pine boards, paint it a crisp white, and use a hidden cleat to mount it. It disappears into the wall, letting your decor pop. So clean, so modern.
Pro Move: Use a sprayer for the paint if you can. It gives you a flawless, brush-stroke-free finish that looks store-bought.
12. The Corner Shelf Unit
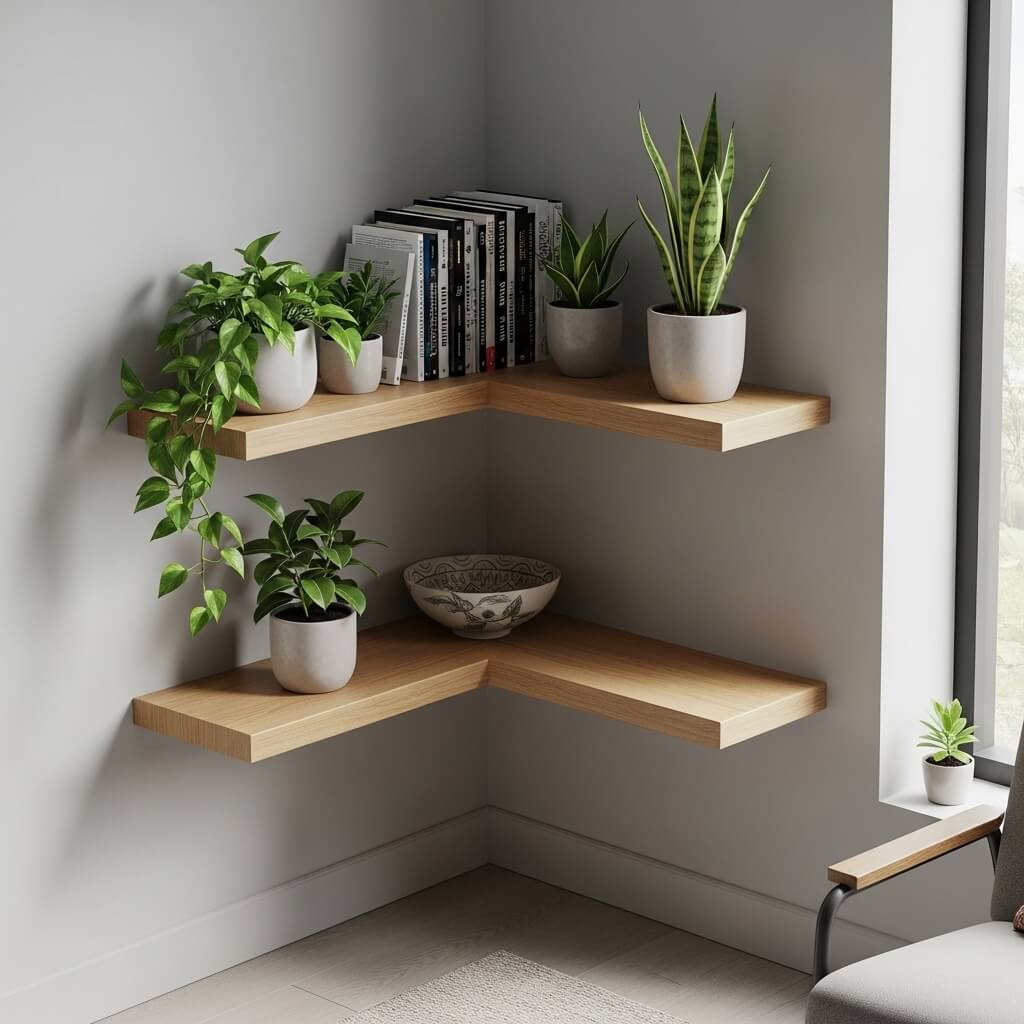
Stop ignoring those corners! Cut two shelves to fit a 90-degree angle and mount them on adjacent walls. It utilizes dead space brilliantly and looks super smart.
Pro Tip: A corner level is your best friend here. Eyeballing it leads to a lopsided mess that will haunt you.
13. The Leather-Strap Hanger
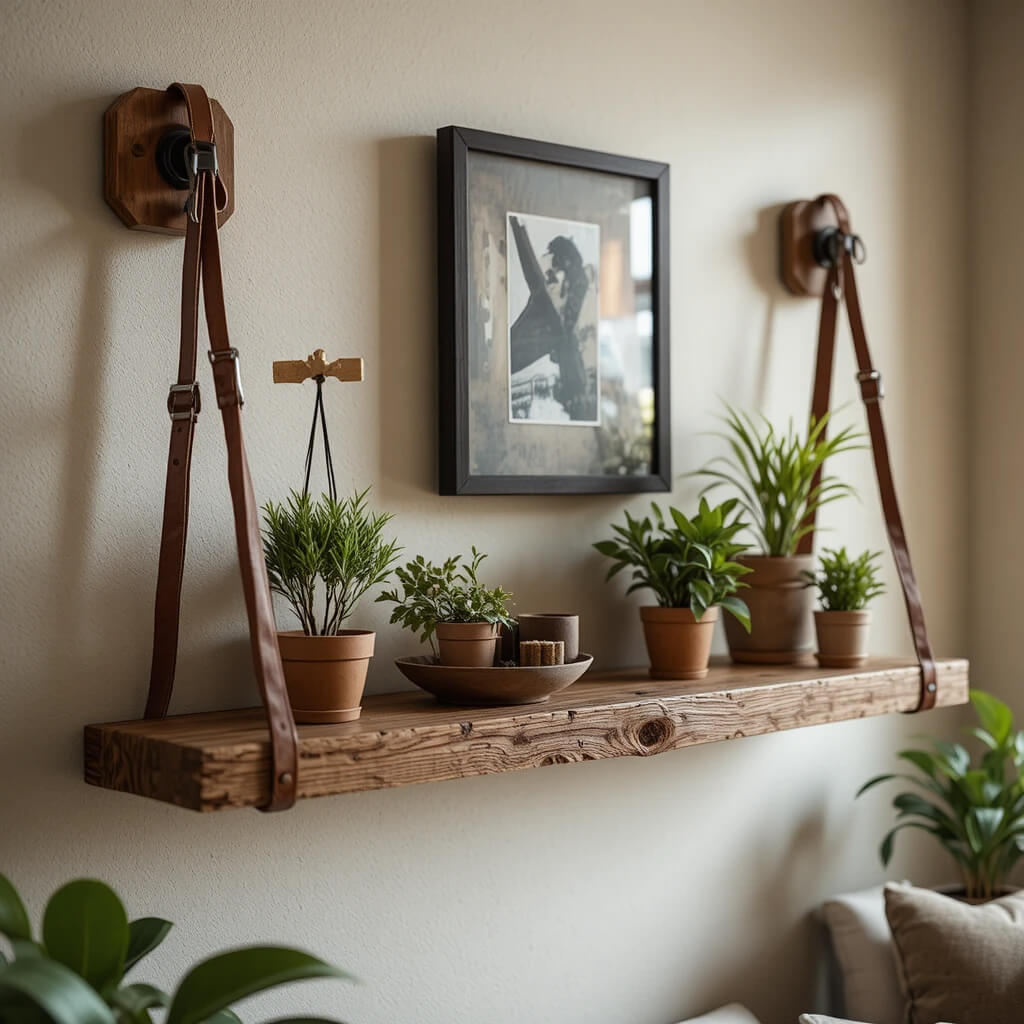
Cut two wide strips of leather, attach them to the back of a wood plank with screws, then hang them from heavy-duty hooks on the wall. It’s rustic, adjustable, and totally unique.
Story Time: I used an old belt for this once. The buckle became the feature. Upcycling win!
14. The Geometric Hexagon Shelf
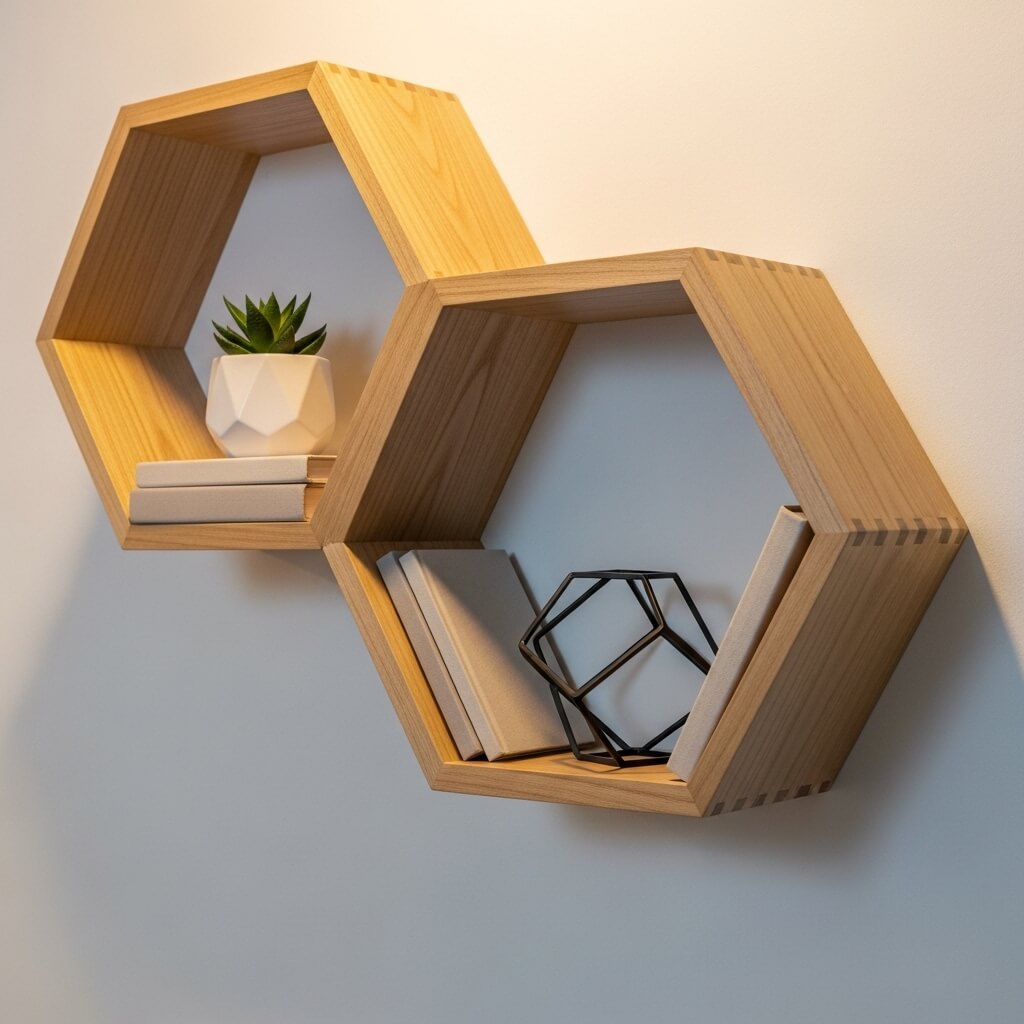
This sounds harder than it is. Cut six identical wood pieces at 30-degree angles, glue and nail them into a hexagon, and mount with a keyhole hanger. It’s a modern, trendy showstopper.
FYI: A miter box is essential here. Unless you’re a wizard with a hand saw, in which case, teach me your ways.
15. The Painted Pegboard Backdrop
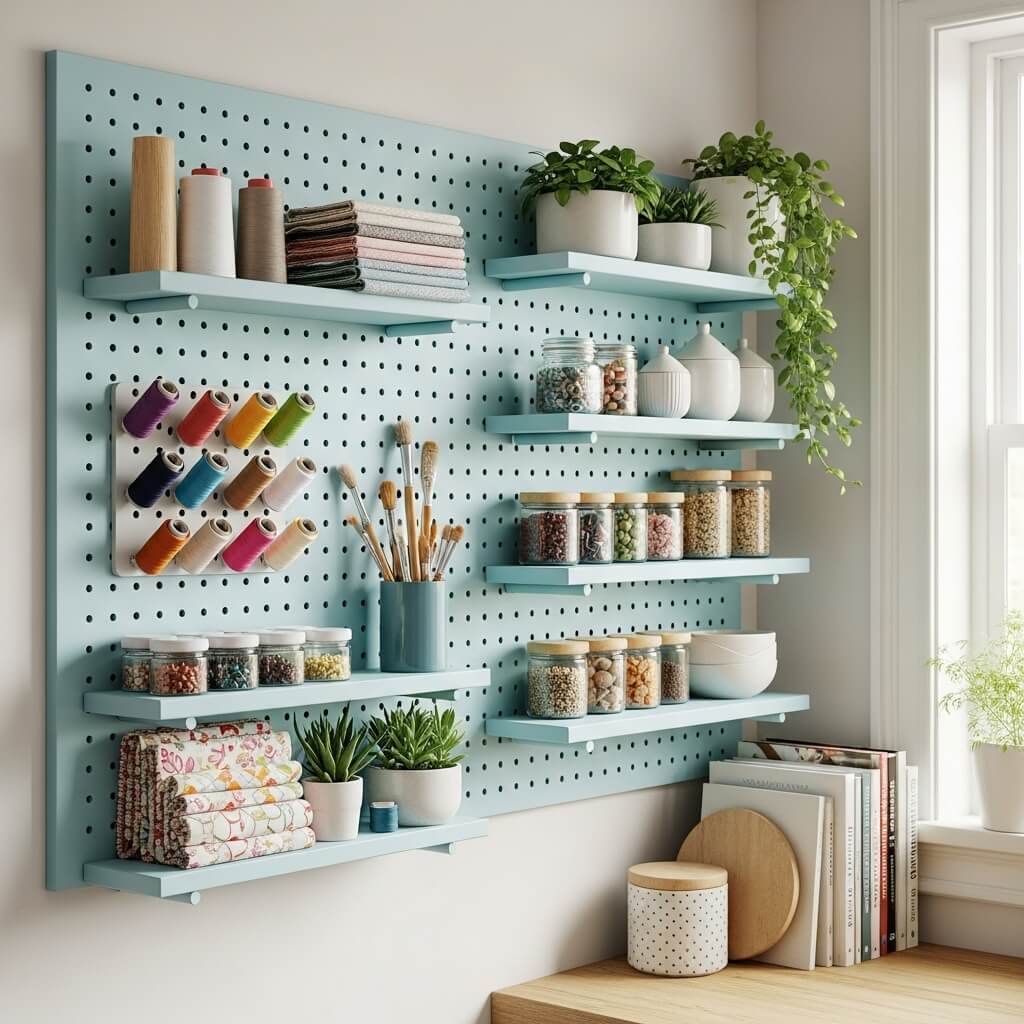
Mount a small, painted pegboard panel, then add small shelves that sit on pegboard hooks. You get a flexible, customizable system perfect for a craft space or kitchen.
Personal Take: Paint the pegboard the same color as your wall for a built-in look. It’s organization that doesn’t scream “garage.”
16. The Stacked & Stained Crates
Take a few wooden crates, stain or paint them uniformly, and screw them together in an interesting stacked formation before mounting. Depth, texture, and tons of room—all in one.
Pro Tip: Screw them together from the inside for invisible connections. It’s all about that seamless illusion.
17. The Bathroom “Floating” Ledge
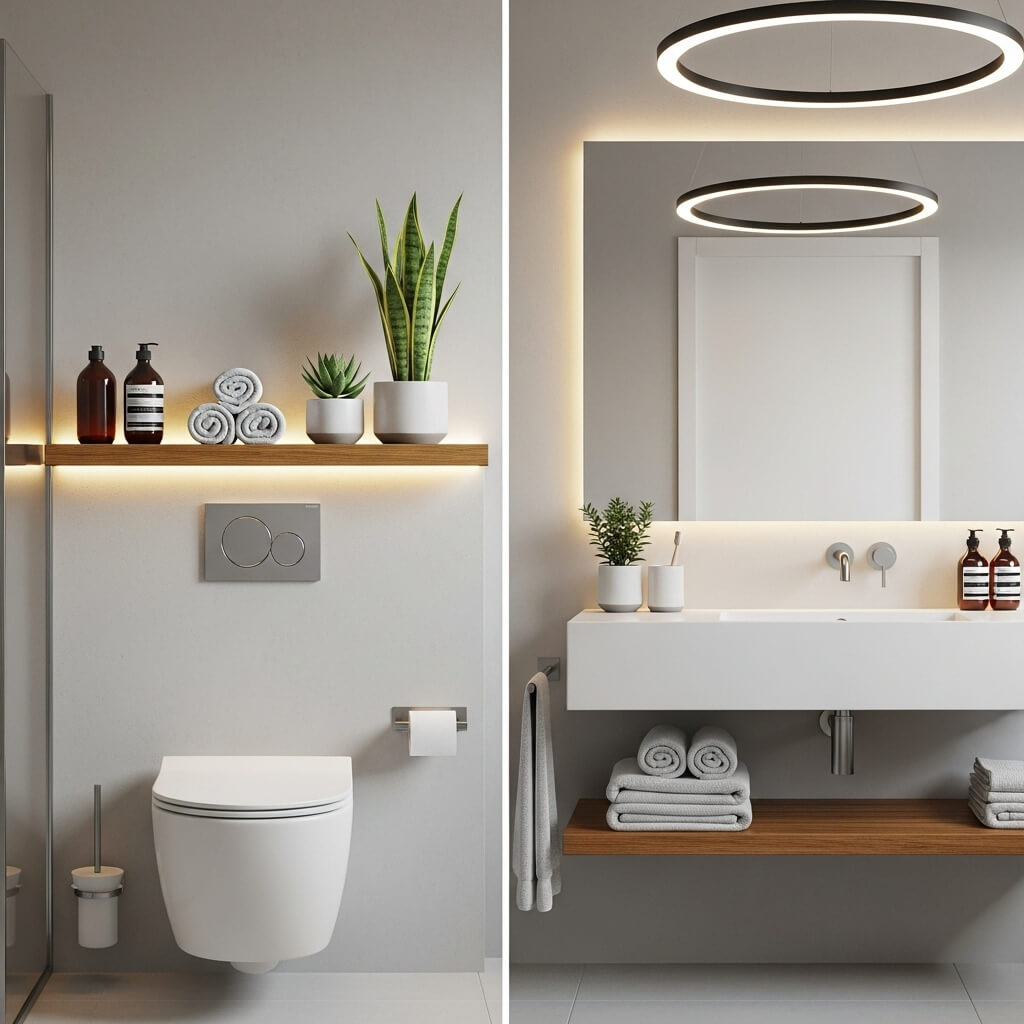
Use a water-resistant wood like cedar or a well-sealed pine. A simple, shallow ledge above the toilet or beside the mirror adds crucial storage without eating up space.
Downside: Moisture is the enemy. Seal that wood like you’re preparing it for a monsoon.
18. The Picture-Ledge Style
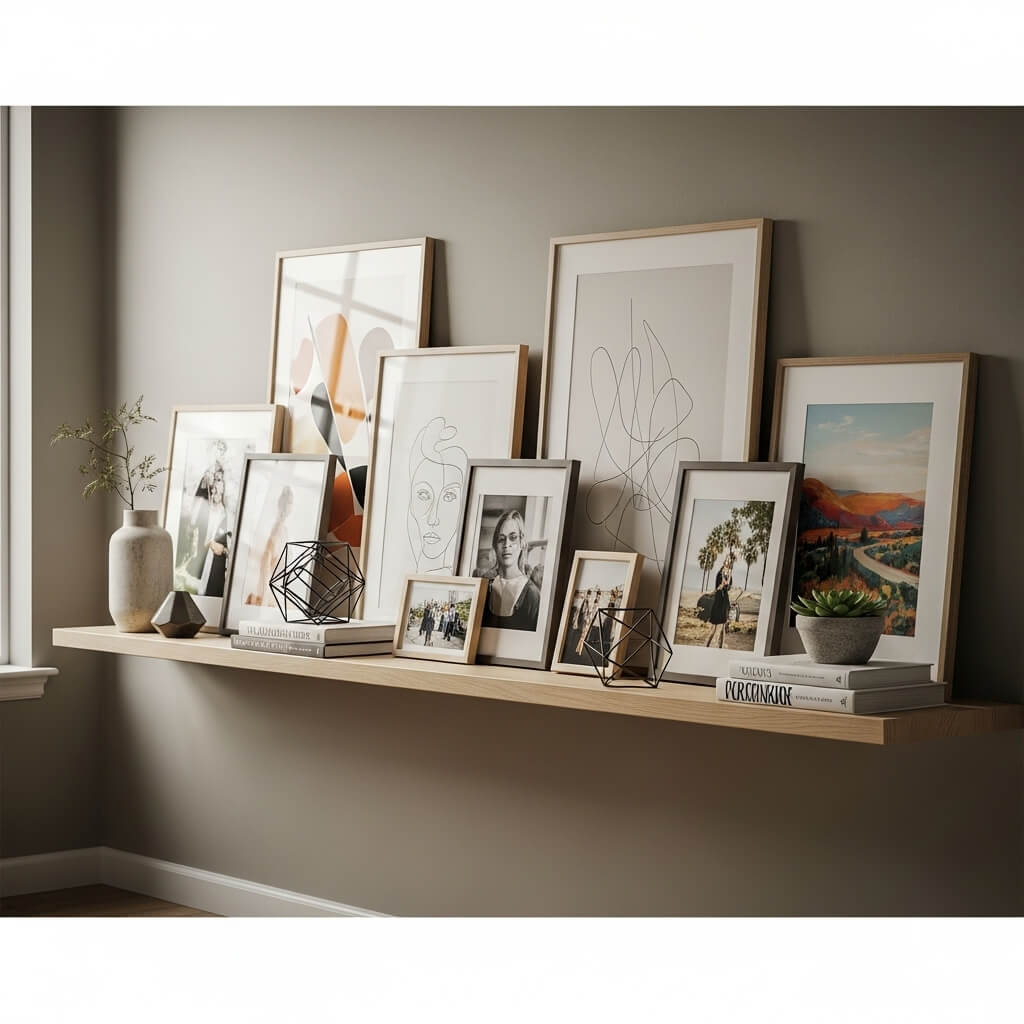
Nail together a simple L-shaped channel from two thin boards. It’s perfect for leaning photos, art, and small knick-knacks. It adds display space without the bulk of a full shelf.
Pro Move: Make it extra long and run it along a whole wall. It creates a killer gallery vibe with minimal effort.
Stop Dreaming, Start Drilling
See? Not one of these needs a weekend-long workshop saga. You’ve got 18 ways to tackle that blank wall, each with its own personality and payoff.
The real magic isn’t just in the extra storage—it’s in pointing to a spot on your wall and saying, “Yeah, I built that.” So pick the one that makes your DIY heart beat faster, grab your tools, and make this afternoon count. That empty wall isn’t going to style itself. What are you building first?