13 Vintage Halloween Crafts for Old-Fashioned Fall Decor
Vintage Halloween Crafts have a special way of making fall feel warmer, cozier, and a little more magical. Instead of relying on plastic decorations and bright orange-and-black accents, you can create a nostalgic Halloween atmosphere with aged textures, antique-inspired details, muted colors, and handmade pieces.
The beauty of vintage Halloween crafts is that they do not need to look perfect. A little wear, uneven stitching, faded paper, or distressed paint can actually make a decoration feel more authentic.
1. Vintage Halloween Crafts With Distressed Pumpkin Signs

Turn a simple wooden board into a charming old-fashioned Halloween sign.
Start with an unfinished piece of wood, then paint it in a muted shade such as creamy white, dusty gray, faded sage, or soft brown. Once dry, lightly sand the edges so the wood underneath shows through.
Add a classic Halloween phrase such as “Happy Halloween,” “Beware,” “Trick or Treat,” or “Welcome, Little Witches.” For an authentically vintage appearance, choose an old-fashioned serif or hand-lettered style rather than a modern font.
Finish the sign with a small painted pumpkin, crow, moon, or bat. A piece of rusty-looking wire or jute twine makes a lovely hanger.
Decorating tip: Place several signs together on a mantel or entryway table rather than displaying one by itself. Layering creates that collected-over-time look that makes old-fashioned fall decor so appealing.
2. Antique-Style Halloween Paper Garland

Paper decorations were a classic part of early Halloween celebrations, making a handmade garland perfect for a nostalgic decorating scheme.
Cut triangles, circles, pumpkins, bats, black cats, or simple flag shapes from kraft paper, cream cardstock, old book pages, or scrapbook paper. For an aged appearance, gently brush the edges with diluted brown paint or distressing ink.
Write one letter on each piece to spell HALLOWEEN, BOO, or TRICK OR TREAT. Punch two small holes at the top of each piece and thread them onto twine.
For extra character, add tiny paper rosettes, lace scraps, fabric bows, or miniature faux leaves between the letters.
This is one of the easiest vintage Halloween crafts to customize because you can make the garland as long or short as your decorating space requires.
3. Black Cat Silhouette Wall Art

Few Halloween images feel as timeless as a mysterious black cat.
Create your own silhouette using black cardstock, thin plywood, or heavyweight paper. Choose a graceful sitting cat with an arched tail for an antique-inspired appearance.
Mount the silhouette against an old-looking frame painted in black, bronze, or distressed gold. You can also place it over a cream background decorated with tiny stars or a crescent moon.
For a truly nostalgic presentation, make several different cat silhouettes and arrange them along a hallway, staircase, or mantel.
The secret to making this project look vintage rather than cartoonish is simplicity. Avoid overly bright colors and complicated details. A strong silhouette paired with an aged frame can look surprisingly elegant.
4. Mason Jar Halloween Lanterns With an Old-Fashioned Glow

Give ordinary glass jars a spooky new life with this simple lighting project.
Clean several jars and decorate the outside with black paper silhouettes of bats, branches, moons, or haunted houses. Add battery-operated tea lights inside rather than real candles for a safer option.
To enhance the vintage feeling, wrap the jar necks with twine, lace, raffia, or strips of torn fabric. You can also place the jars inside old wooden crates or on a weathered tray.
At night, the little lights create shadows that make the silhouettes appear almost magical.
These lanterns look especially beautiful on a porch, mantel, dining table, or windowsill. They are also inexpensive enough to make in a group, which creates a much stronger visual effect.
5. Vintage Halloween Crafts Using Old Book Pages

Old-looking paper instantly adds character to seasonal decorating.
If you have damaged books, outdated dictionaries, or decorative reproduction pages that are suitable for crafting, use them to make pumpkins, leaves, rosettes, bats, or hanging ornaments.
One simple idea is to cut several pumpkin shapes from paper, fold each shape down the center, and glue the folded pieces together. Open the finished form to create a dimensional paper pumpkin.
You can also roll book pages into cones and arrange them into a wreath. Add a black ribbon, dried leaves, or a small wooden sign for contrast.
The combination of creamy paper, black accents, and natural textures works beautifully with traditional autumn colors.
Important: Use books intended for crafting or pages you have permission to repurpose rather than cutting up valuable antique books.
6. Rustic Pumpkin-and-Crow Centerpiece

For a centerpiece that feels like it came from an old country farmhouse, combine pumpkins with dark, dramatic accents.
Choose several pumpkins in different sizes and colors. Cream, muted orange, green, and weathered white pumpkins work particularly well. Arrange them in a wooden bowl, shallow crate, or antique-style metal container.
Add faux crows, dried branches, pinecones, seed pods, and autumn leaves around the pumpkins.
A few black candles can provide height and contrast. If you prefer a more natural arrangement, replace candles with lanterns or small glass bottles filled with dried grasses.
This is one of those vintage Halloween crafts that can transition beautifully from September through Thanksgiving. Simply remove the crows and Halloween-specific accents when October ends.
7. DIY Halloween Potion Bottles

Transform ordinary glass bottles into mysterious antique-style apothecary containers.
Save interesting bottles with unusual shapes, or use inexpensive decorative glass containers. Clean them thoroughly and add homemade labels with names such as:
- Moonlight Elixir
- Witch’s Brew
- Midnight Tonic
- Raven’s Remedy
- Autumn Spell
- Pumpkin Potion
Print labels on cream or brown paper and distress the edges slightly. Secure them with glue or double-sided tape.
For an aged appearance, tie twine around the neck and add a tiny faux key, dried herb, feather, or wax-style seal.
Display the bottles on a tray with candlesticks, books, pumpkins, and dried flowers. Grouping objects at different heights makes the arrangement look like a genuine old collection rather than a collection of new decorations.
8. Aged Halloween Candle Holders

Candles are one of the easiest ways to create an old-world Halloween mood.
Look for inexpensive wooden or metal candlesticks at thrift shops, flea markets, or craft stores. Paint them in black, charcoal, cream, or antique bronze. Once dry, lightly distress the raised edges.
Place battery-operated taper candles into the holders if you want a safer option for everyday decorating.
For added character, arrange the candle holders in groups of three with different heights. Surround them with small pumpkins, dried leaves, and old-style Halloween signs.
The result is elegant, atmospheric, and much more timeless than brightly colored seasonal decorations.
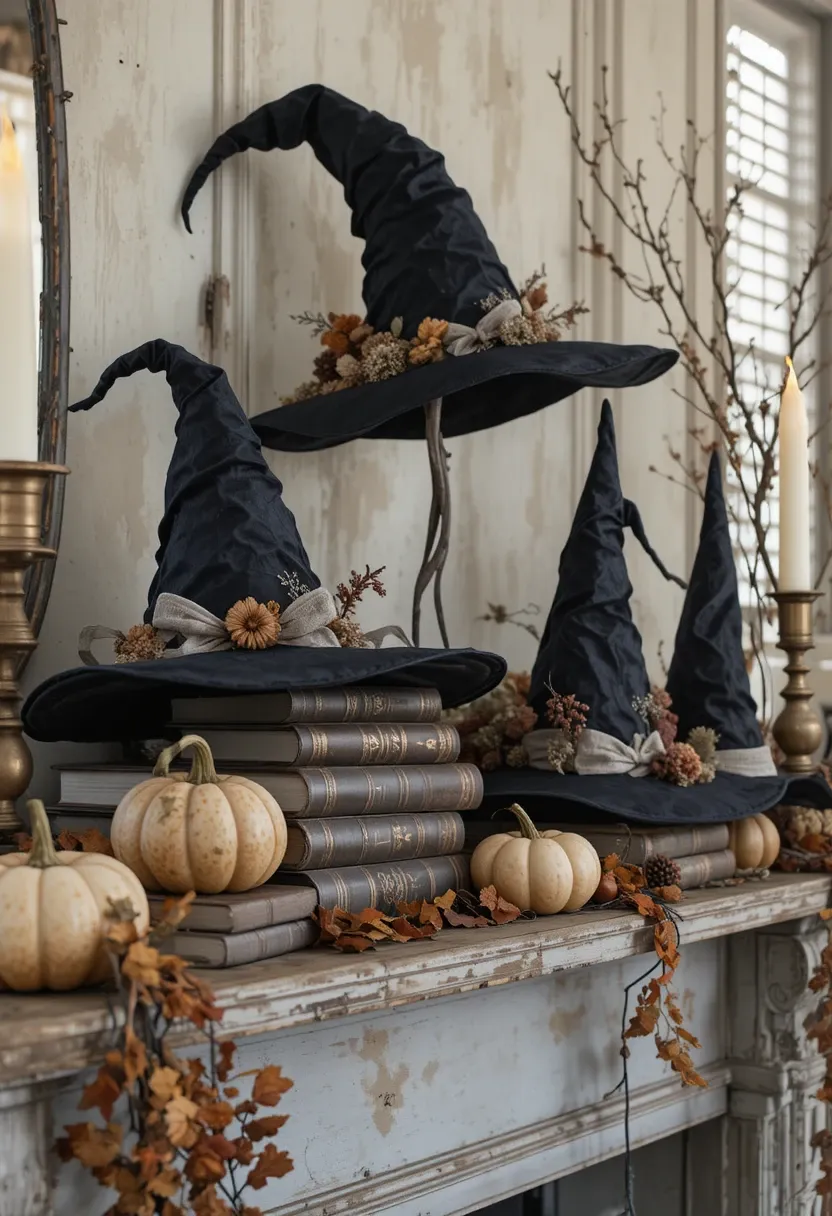
9. Vintage Halloween Witch Hat Decorations

Give the traditional witch hat a softer, more nostalgic makeover.
Create cone-shaped hats from black craft paper, felt, or fabric. Instead of adding glitter or neon decorations, use muted ribbon, lace, faux dried flowers, twine, or small fabric bows.
For a distressed look, gently brush the edges with gray or brown craft paint. You can even add a few intentional wrinkles so the hat looks like an old costume discovered in an attic.
Hang small hats from a mantel, place one on a stack of old-style books, or create several sizes for a porch display.
Pair them with pumpkins and dried foliage to make the Halloween theme feel connected to the rest of your fall decor.
10. Handmade Halloween Memory Wreath

A wreath does not have to be covered in plastic spiders to look festive.
Begin with a grapevine wreath or a simple twig base. Add dried-looking foliage, muted fabric strips, faux black berries, miniature pumpkins, and a few paper bats.
For a nostalgic focal point, place a small antique-style Halloween illustration in the center. You can use a reproduction image of a vintage pumpkin, black cat, witch, moon, or autumn scene.
Finish with a wide strip of faded-looking ribbon.
This project works particularly well on a front door because the natural materials complement pumpkins, mums, and other autumn porch decorations.
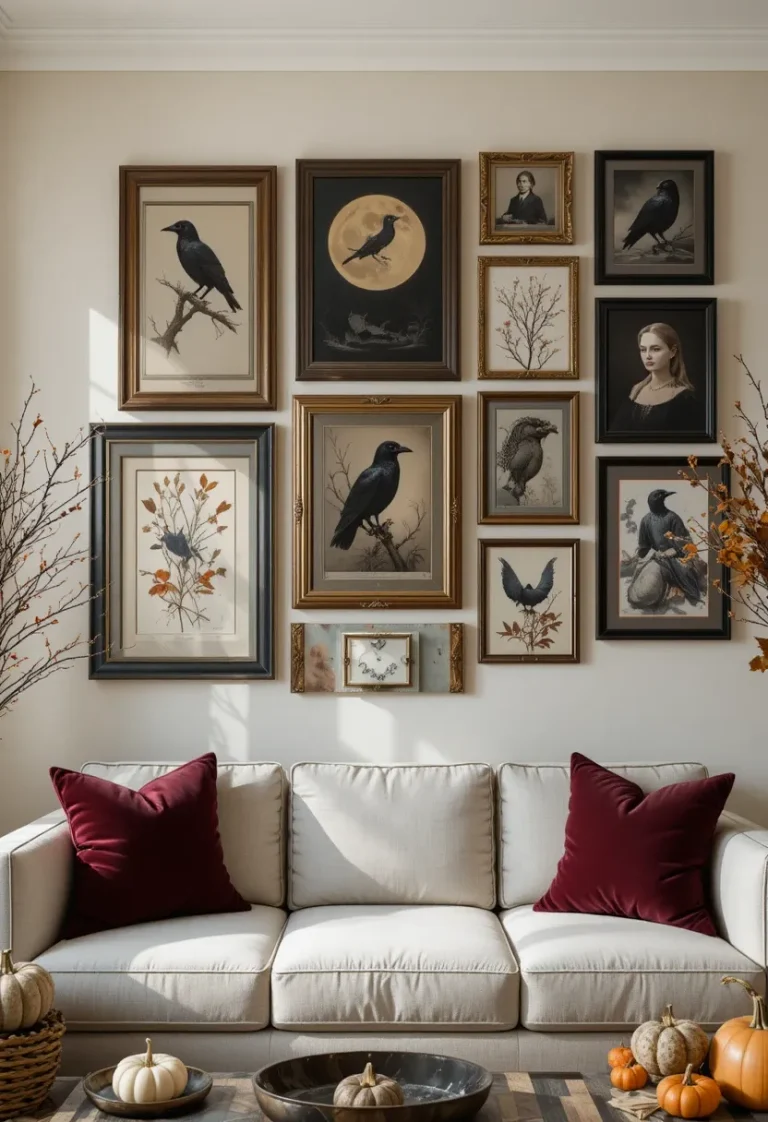
11. Victorian-Inspired Halloween Picture Frames

Create an eerie gallery wall using inexpensive frames and Halloween-inspired artwork.
Look for ornate frames with interesting details. Paint mismatched frames in black, aged white, bronze, or muted gold, then distress them lightly.
Fill them with reproduction Halloween illustrations, old-fashioned botanical prints, moon phases, ravens, pumpkins, or mysterious silhouettes.
For an extra playful touch, create fictional Victorian-style portraits of witches, cats, or masked Halloween characters.
Arrange the frames in an intentionally imperfect gallery wall. They do not need to match. In fact, different shapes and finishes will make the display feel like a collection gathered over many years.
This is a particularly good choice if you want vintage Halloween crafts that can become reusable decor year after year.
12. Fabric Pumpkin Garland

Turn fabric scraps into soft pumpkins for a cozy Halloween garland.
Choose fabrics in faded orange, cream, brown, charcoal, plaid, ticking stripe, or tiny floral patterns. Cut simple pumpkin shapes, sew or glue the edges, and lightly stuff them with fiberfill.
Add small fabric stems and arrange the pumpkins on twine.
You can make every pumpkin slightly different. Uneven shapes and mixed fabrics actually strengthen the handmade, vintage appearance.
Hang the finished garland across a mantel, shelf, cabinet, staircase railing, or dining room hutch.
If sewing is not your thing, no problem. Use fabric glue to create a no-sew version that can be completed in an afternoon.
13. Old-Fashioned Halloween Table Setting

Bring all your vintage Halloween crafts together with an old-fashioned table setting.
Start with a neutral tablecloth, lace runner, or natural linen. Layer mismatched plates, vintage-style glasses, wooden chargers, and cloth napkins.
Add a centerpiece made from pumpkins, dried leaves, candle holders, and miniature potion bottles. Small handwritten place cards can make the table feel even more personal.
For color, stay with earthy shades: burnt orange, cream, brown, charcoal, faded green, and deep burgundy. These colors create a sophisticated autumn atmosphere without making the table feel overly themed.
A few handmade paper bats scattered across the table can provide just enough Halloween personality.
How to Make Vintage Halloween Crafts Look Authentic
The difference between ordinary Halloween decor and convincing old-fashioned decor often comes down to texture and restraint.
Keep these simple principles in mind:
Choose muted colors.
Cream, charcoal, brown, faded orange, olive green, burgundy, and antique gold generally feel more vintage than highly saturated colors.
Mix old and new.
You do not need an entire house filled with antiques. Pair inexpensive new craft supplies with thrifted frames, wooden boxes, glass bottles, baskets, or candlesticks.
Embrace imperfections.
A handmade decoration should not look factory-perfect. Slightly uneven edges, distressed paint, wrinkles, and natural wear can add charm.
Layer your decorations.
Place books beneath pumpkins, tuck dried leaves around candle holders, and overlap signs with garlands. Layers create depth and make displays feel collected.
Use natural materials.
Wood, twine, linen, paper, dried flowers, grapevine, and cotton fabric naturally complement an old-fashioned fall theme.
Avoid overdecorating.
A few carefully chosen pieces can have more impact than filling every surface. Leave some empty space so the individual details can be appreciated.
Easy Ways to Display Your Vintage Halloween Crafts
Once your projects are finished, think beyond the traditional mantel.
Create a welcoming front porch vignette with distressed signs, pumpkins, lanterns, and a handmade wreath.
Turn a bookshelf into a Halloween display by layering old-style books with potion bottles, black cats, miniature pumpkins, and framed artwork.
For the kitchen, add a small garland to an open shelf or display handmade potion bottles beside a wooden cutting board.
In the entryway, combine a vintage mirror with a few black candle holders, a pumpkin, and a small Halloween sign.
For the dining room, use fabric pumpkins, dried foliage, antique-style frames, and candlelight to create a cozy autumn tablescape.
The goal is not to make every corner scream Halloween. Instead, let small nostalgic details appear naturally throughout your home.
Final Thoughts
Vintage Halloween crafts make decorating feel personal because every handmade piece can tell a little story. Distressed signs, paper garlands, fabric pumpkins, potion bottles, candle holders, and old-fashioned silhouettes can turn ordinary rooms into warm, nostalgic spaces filled with autumn character.
The best part is that you do not need expensive supplies or professional crafting skills. Start with what you already have, embrace imperfect details, and combine natural textures with muted Halloween colors. With these 13 ideas, you can create a home that feels less like a seasonal display and more like a charming old house welcoming October.

13 Vintage Halloween Crafts for Old-Fashioned Fall Decor
Bring nostalgic Halloween charm into your home with these 13 vintage Halloween crafts inspired by old-fashioned fall decorating. Discover creative DIY ideas featuring antique-inspired details, classic Halloween colors, rustic textures, and timeless seasonal accents perfect for creating a cozy, nostalgic atmosphere. Save these vintage craft ideas for your next fall decorating project. Explore the ideas and bring vintage Halloween style home. #VintageHalloween #HalloweenCrafts #FallDecor #HalloweenDecor #DIYHalloween #RusticDecor
Pin it on Pinterest